Pages

Thursday, February 20, 2014

Fun with Fabscraps!

Hi everyone, we're on a roadtrip so I've been scrapping in the RV today.  That's always challenging as its hard to remember to bring everything I might want or need!  I did do 2 layouts today, we won't discuss the first one because I don't like it, however, I do like this one that I did with Fabscraps Beachcomber collection.  I love lighthouses so you know this page called my name!  Its not like me to leave more than half of the page blank either but I didn't want to cover the lighthouse image!

For my background, I used a Prima mask and 13 Arts masking paste, then I sprayed with Shimmerz and Lindy's.  I fussy cut some sand dollars and starfish from one of the other papers in the collection to add to my cluster of metal flowers and objects.  At the top and bottom of the page I streaked on some embossing ink and used Stampendous shabby white embossing powder at the top and aged silver at the bottom.


I also added some aged silver embossing powder to the metal flowers just to give them a more interesting look.


Thanks for stopping by, I really appreciate it!!


Thursday, February 13, 2014

A Bittersweet Announcement

I am sad to tell you that this is my last creative team layout for the Flying Unicorn.  I have been at the Flying Unicorn for nearly 2 1/2 years and it is time for me to move on.  We are leaving Friday for a 5 week road trip in our RV so it is a natural time for me to step down.  I have so enjoyed my time as a Unicorn and I will miss my daily interaction with the rest of the creative team as well as our fabulous members!

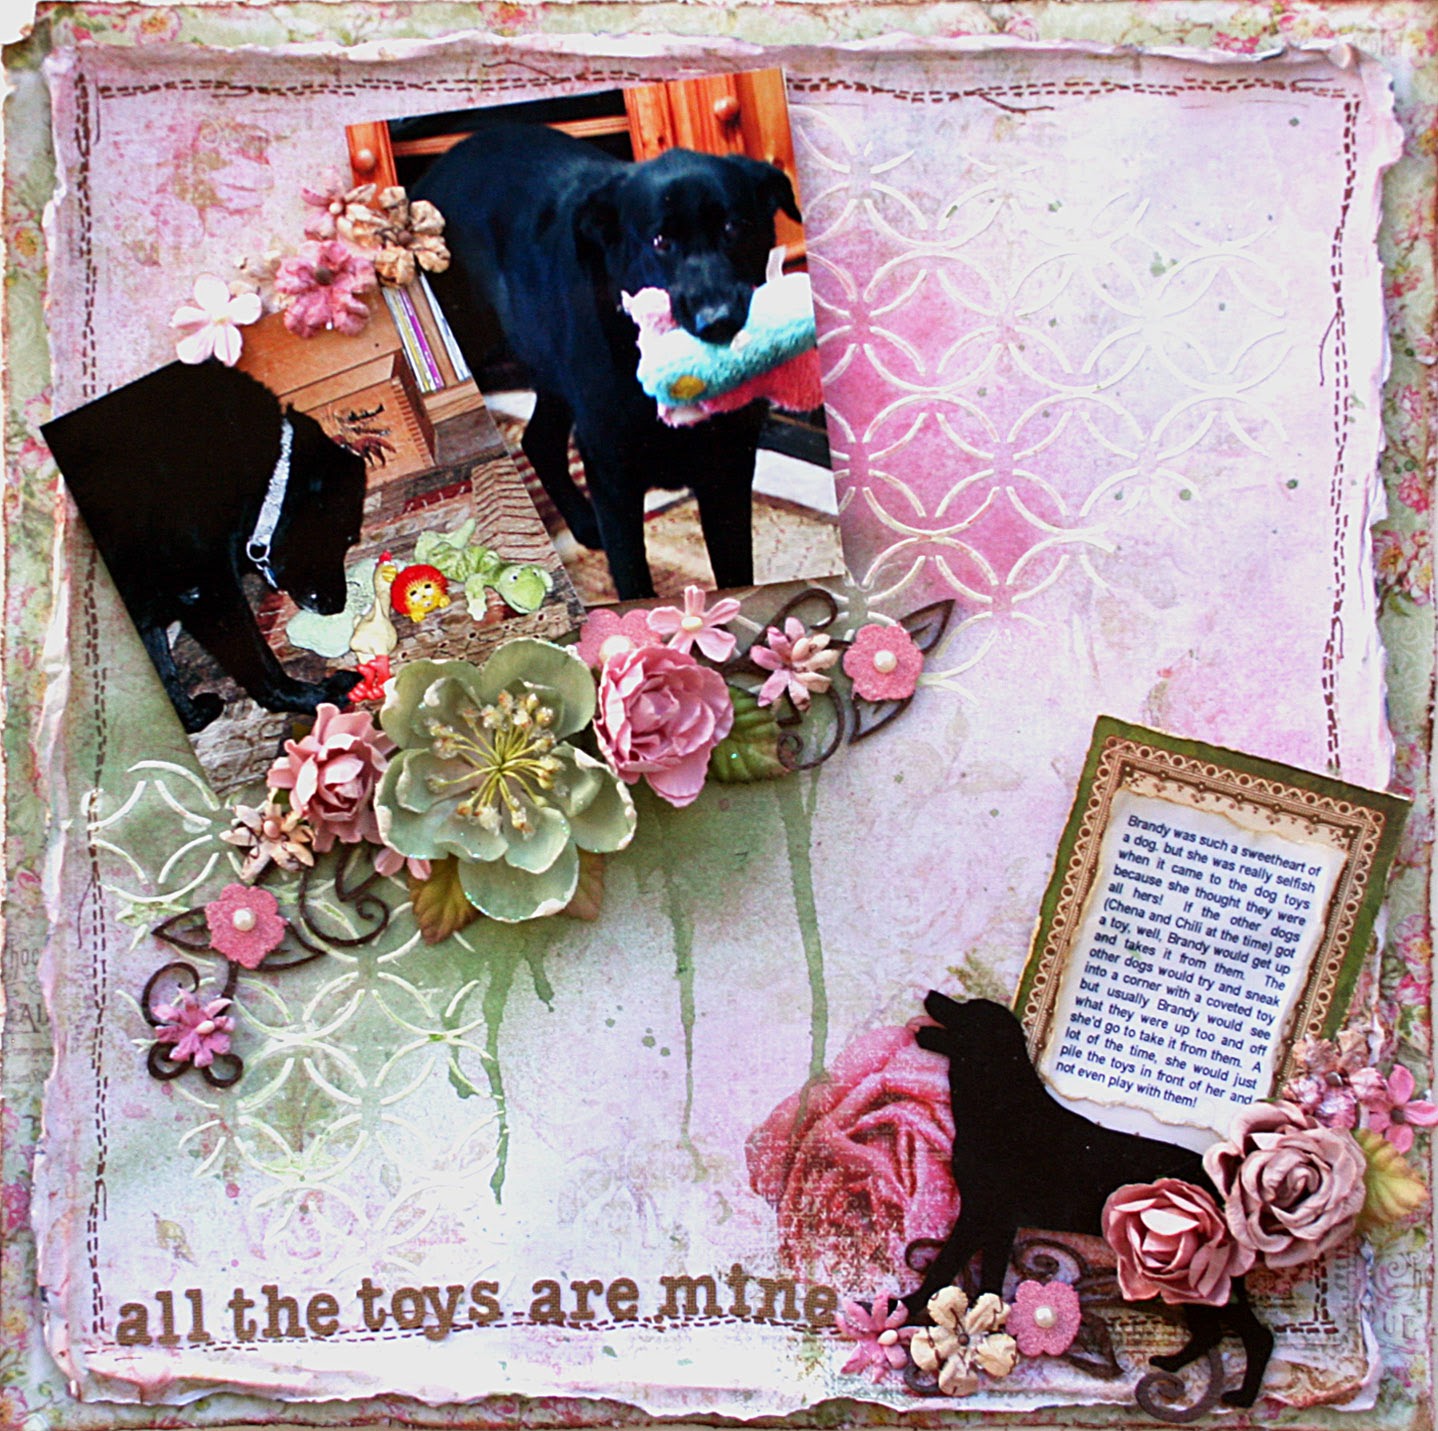
I did this layout with the Flying Unicorn February KOM and some Leaky Shed chippies from my stash.  The Kaisercraft and Inkido papers in the kit were just perfect for this layout!

This is my sweet Brandy. She left us Dec 28, 2007 but as with all our furbabies, she lives forever in our hearts!

Brandy was an alpha female but she was a really sweet gal and sometimes oh, so silly! The only thing bad about her was that she thought all the toys were hers. The two poodles we had at the time were not allowed to play with the toys, ever. When they would get a toy, Brandy would get up and take it away from them and the poodles would just sit in respectful silence as Brandy collected all their toys!

I love these two photos of Brandy collecting the toys, after which, she laid down and protected them!


Underneath my floral cluster I've used a Leaky Shed Flower Corner but I've cut it in two pieces and layered it under my flowers. I painted it with Via Maya Cacao and used Range Antiquities Rose Quartz for the flowers on the chippy.


In this closeup you can see both the Flower Leaf Corner and Labrador #3 chipboard pieces.

Leaky Shed has such a wonderful range of pet chippies and I really love this Labrador #3 chippie as it looks just like our Brandy's profile. I simply painted it all black except for that sweet pink tongue! Leaky Shed has a whole line of dog and other animal chippies and they are so fun to use with your furbaby projects.

Supplies: (from the kit unless otherwise noted)
Patterned paper: Kaisercraft Key to My Heart collection: Base - Irresistable, journal tag - Attraction, green frame - Green flowers Inkido Beautiful Memories collection,
Letters: Prima Lifetime (from an earlier kit)
Chipboard: Leaky Shed Labrador #3 6082-33, Flower Corner 362CB (both from my stash)
Embossing powder: Ranger Antiquities Rose Quartz (from my stash)
Flowers: Prima Tatiana 566364 (stash), Petaloo Darjeeling pink wild mini blossoms 1481 130 (stash), Kaisercraft paper blooms dusty pink
Ink: Ranger Archival coffee (stash)
Mist: Shimmerz Spritz Olive Branch (stash)
Masks: Prima 564216 (stash)
Masking paste: 13 Arts Ayeeda Gesso (from January kit)
Paint: Viva Maya Gold Cacao (stash)
Other: ZVA white pearls, Prima Cling Stamps 570514

I have loaded up our RV with lots of scrappy goodies and I will be stopping by the Flying Unicorn store and warehouse while in Florida so I will have an occasional creation share with you.

A special thanks to all the Unicorns that have followed me and I will see you here and on Facebook.  And don't be surprised when I stop in the Forums!

Sunday, February 9, 2014

New Fabscraps at the Flying Unicorn Store!

I am loving these new collections from Fabscraps, Beachcomber and French Heritage!

Beachcomber is just perfect for your summer photos at the beach or lake or even cruise photos!

My cluster is a hodgepodge of collected pieces.  The purple is part of an old Prima flower that was ugly and yellow.  Now it's standing in as a piece of coral.  I painted it with Viva Maya Gold paint in Rose and then sprinkled it with clear microbeads.   The berries came from Hobby Lobby and of course I had to add in some Dusty Attic fish net covered with embossing enamel.  Then I finished it off with shells and metal pieces.

The title is a Fabscraps chippy that I've covered with embossing enamel.


You can really see the micro beads in this photo.

 Supplies:
Fabscraps Beachcomber collection
Fabscraps Imagine chipboard
Dusty Attic fishnet chipboard
Lindy's Tibetan Poppy Teal and Moonshadow Buccaneer Bay Blue, Smooch grape mists
Viva Maya Gold Rose paint
Viva Stone-Art
Splash of Color Silks in Vavoom Red, Oyster
Stampendous shabby white and aged wine embossing enamels
Recollections clear microbeads

 Up next a vintage styled layout done with Fabscraps French Heritage.   I seriously love this paper!!

Leaky Shed small flower corner embossed with Stampedous aged silver embossing enamel


Supplies:
Leaky Shed Small Flower Corner
Prima Layla flowers
ZVA flowers
Walnut Gold and Crushed Shells Glimmer Mist
Mix'd Media Inx honey and pewter
Distress ink - tea stain
TCW mask
Prima stamp stitches
Spellbinders Nestabilities Decorative Labels 8


Tutorial - Sweet Sentiments layout!

I've been working with G45 Sweet Sentiments lately, though its not my usual style as I really don't love pastels, Sweet Sentiments is sooo pretty and the peach and purples in the collection really pop.  So, I want to share this layout with you and a build a page tutorial.  Feel free to alter or copy as you wish.

I've done several layouts celebrating my parent's 70th wedding anniversary but this is my favorite.  My Mom looks so pretty, Dad not so much, LOL, but this layout is all about Mom.  She sure looks good at 91 1/2 years don't you think?


Tutorial:
1.  Cut out the following pieces:
      frame & 9" blue circle - Sweet Sentiments 4500800
      fussy cut cupid - Sweet Sentiments 4500800
      6" circle - Be My Valentine 4500802
      Spellbinders square fleur de lis frame - Bazzill Peach Glow
      Cut apart floral bouquet - Be My Valentine 4500802
      Blue stripe mat for cut apart - All My Love 4500803


2.  Use a Martha Stewart corner punch to punch around the edges of the two circles.  I used Scallop 3 Dot to punch the large circle and Deco Fan to punch the small circle.

Ink all the papers with Mix'd Media Inx in Peaches and Peridot


3.  Cut the blue mat to place under the floral cut apart just slightly larger that the cut apart card, about 2 1/8" x 3 1/8".  Pop up the cut-apart card before mounting on the striped mat.

4.  Use foam tape, squares, pop dots or cardboard to pop up the Spellbinders frame and the fussy cut cupid.

5.  Now we have most of our parts assembled, lets put it all together now.  Start by adherring the frame to the base paper, Perfect Petals 4500801.  Then adhere the large circle on the left side overlaping the frame on the side.

6.  Now adhere the 8" doily on the right side overlapping the frame on the right and the bottom.  Next adhere the matted floral cut-apart just below the frame on the right.  Leave 1/4" between the frame and the blue striped mat.  Then position the cupid and adhere.   

7.  Pop up the photo and position on the Spellbinders Fleur de lis diecut and then position that over the small circle and adhere about 5" from the top of the page and about 3" from the right side.  Pop up the title tag "Celebrate" and adhere beneath the photo.

8. On the right side I've added a tag from Tags and Pockets 4500810 on which I've mounted a tiny photo of the sign in front of their church.  Add your flowers and that's all there is to it!

Here's the finished layout, you might notice that I changed the flowers around a little bit!


 Here you can see how the layers are popped up.  This really adds interest to your layouts, give it a try!

Supplies list:

Bazzill Peach Glow cardstock
Graphic 45 Sweet Sentiments collection:  
frame and blue circle - Sweet Sentiments 4500800 
floral print - Perfect Petals 4500801
pink pattern & cut apart - Be My Valentine - 4500802
blue stripe - All my Love 4500803
Tags and Pockets -  4500810

Spellbinders fleur de lis square frame
Martha Stewart corner punches:  Scallop 3 Dot, Deco Fan
Petaloo Mixed Textured Blossoms Apricot & Teal
Ink:  Mix'd Media Inx Peaches & Peridot
8" Doily
Saturday, February 8, 2014

Graphic 45 French Country banner and letters tute!

This was a really fun banner to make and it's the first one I've done.  I'm going to hang it in my studio!  I used Graphic 45 papers to make my banner and a number of Leaky Shed chippies.  Below I have shared the process for preparing the letters.
  Here's the whole banner.

The banners are Leaky Shed chipboard pieces that I've covered with French Country papers  and are nicely sized at 6.4" x 8" as are the letters which are 4" tall.


Letters Tutorial
I love altering my letters and this is one of my favorite methods for giving them a vintage and worn appearance.  The steps for making the letters are as follows:
1.  Paint the letters with acrylic paint in vintage white and allow to dry.
2.  Ink around the edges of the letters with Frayed Burlap Distress ink.
3.  Stamp the letters with a patterned or script stamp using Archival ink in coffee.      Be sure to use Archival ink so that it doesn't smear in the next step.
4.  Apply a thick coat of Ranger Crackle Accents and allow to dry naturally, i.e. do not use a heat gun to speed the process.
5.  Rub Frayed Burlap Distress ink into the cracks.
6. Take a lightly moistened paper towel and lightly wipe the ink off the letters leaving ink in the cracks but not on the surface of the letter.

The word inspire is a Leaky Shed chippy that I've covered with Stampendous Aged Embossing Enamel in aged spice.

Up in the corner is a Leaky Shed butterfly that I've simply painted with Splash of Color Silks in Emperor's Gold.

The sunflower is handmade using a Spellbinders die and Heartfelt Creations stamp.

This sunflower is also handmade but using Spellbinders Sunflower Set 2.


I added a Julie Nuttig doll to this banner.  I painted her body with iridescent water colors and cut her dress from a French Country paper scrap.  I really love these chipboard dolls, they are so fun and work with so many different projects:  cards, tags, layouts and even banners!


On this banner I've used a Leaky Shed oval frames behind the letter T.  The frame has been heat embossed, again with  Stampendous Aged Embossing Enamel in aged spice.


Leaky Shed Studios chipboard pieces used:


Other Supplies:
Graphic 45 French Country Collection
Prima Mountain Lily Sunflower
Spellbinders sunflower set 2 die
Spellbinders blossom 2 die
Heartfelt Creations Aztec Gold Sunflowers stamp

Many Graphic 45 and Leaky Shed products are available at the Flying Unicorn store.  

Thank you for the comments you leave, I really appreciate it and love hearing from you!


Sunday, February 2, 2014

Graphic 45 Sweet Sentiments tag and tute!

Hi there!  Here's a quick Valentine's tag you can make to attach to a gift or simply give as a valentine to a special someone.  I've used Graphic 45's Sweet Sentiments collection which has such gorgeous Valentine images!


You can see how the layers are popped up in this close up view.


Steps to make this tag:

1.  Cut out the following pieces:
     base tag - 3.5" x 10"  from Spring Has Sprung 4500806
     2 floral border strips, 2.5" long, Spring Has Sprung 4500806
     Cut Apart cupid picture from Be My Valentine 4500802
     "Be My Valentine" tag from Be My Valentine 4500802
     Fussy cut cupid from Sweet Sentiments 4500800
     Small stamp from Spring has Spring 4500806
     
2.  I wanted to tone down the color on the base tag so I misted it with Mister Huey opaque white.  Then I sprayed on a little Heidi Swapp Georgia Peach mist.  You can skip this step if you wish since most of the tag is going to be covered anyway!

3.  Adhere the floral strips to the tag, on either side of the center hole.  I originally was going to have just the one strip you see in the photo but after I finished the tag I decided it needed on on both sides!

4.  Glue some small lace all around the cut-apart "Be My Valentine" cupid.  I used a heart lace from Hobby Lobby.


5.  Now to give the tag some dimension, let's pop up some of our layers.  You can use pop dots, foam squares or tape.  Notice that I have used cardboard under the cut-apart.    I love using cardboard because you don't have to worry about sag like you do with popdots and I like that I am recycling.


6.  Now adhere the cut-apart about 2.25" down from the top of the tag to the top of the cut-apart (not the lace).

7.  Adhere the Be My Valentine sentiment to the bottom of the tag.

8.  Now it's time to position the fussy cut cupid.   I had to figure out exactly where the cupid was going before adding foam tape to pop him up.  Then I put one of the little stamps in his hand as if he is holding out a valentine.  Originally I had fussy cut some flowers but decided I liked the little stamp better.


9.  Add some flowers, greenery and a ribbon at the top and you're done!  I made the flowers using McGill's Floriano punch but commercial flowers would work just as well.  Petaloo's Mixed Textures Blossoms in Apricot go very nicely with these papers.


Thanks for stopping by, hope you enjoyed the tutorial. I've got a French Country Banner coming up on Saturday and on Sunday I will be sharing a build a page tutorial, hope you'll come check them out!

Saturday, February 1, 2014

February Flying Unicorn Kit Creations

The February KOM and addons from the Flying Unicorn features soft romantic colors sure to inspire you in the month of love!

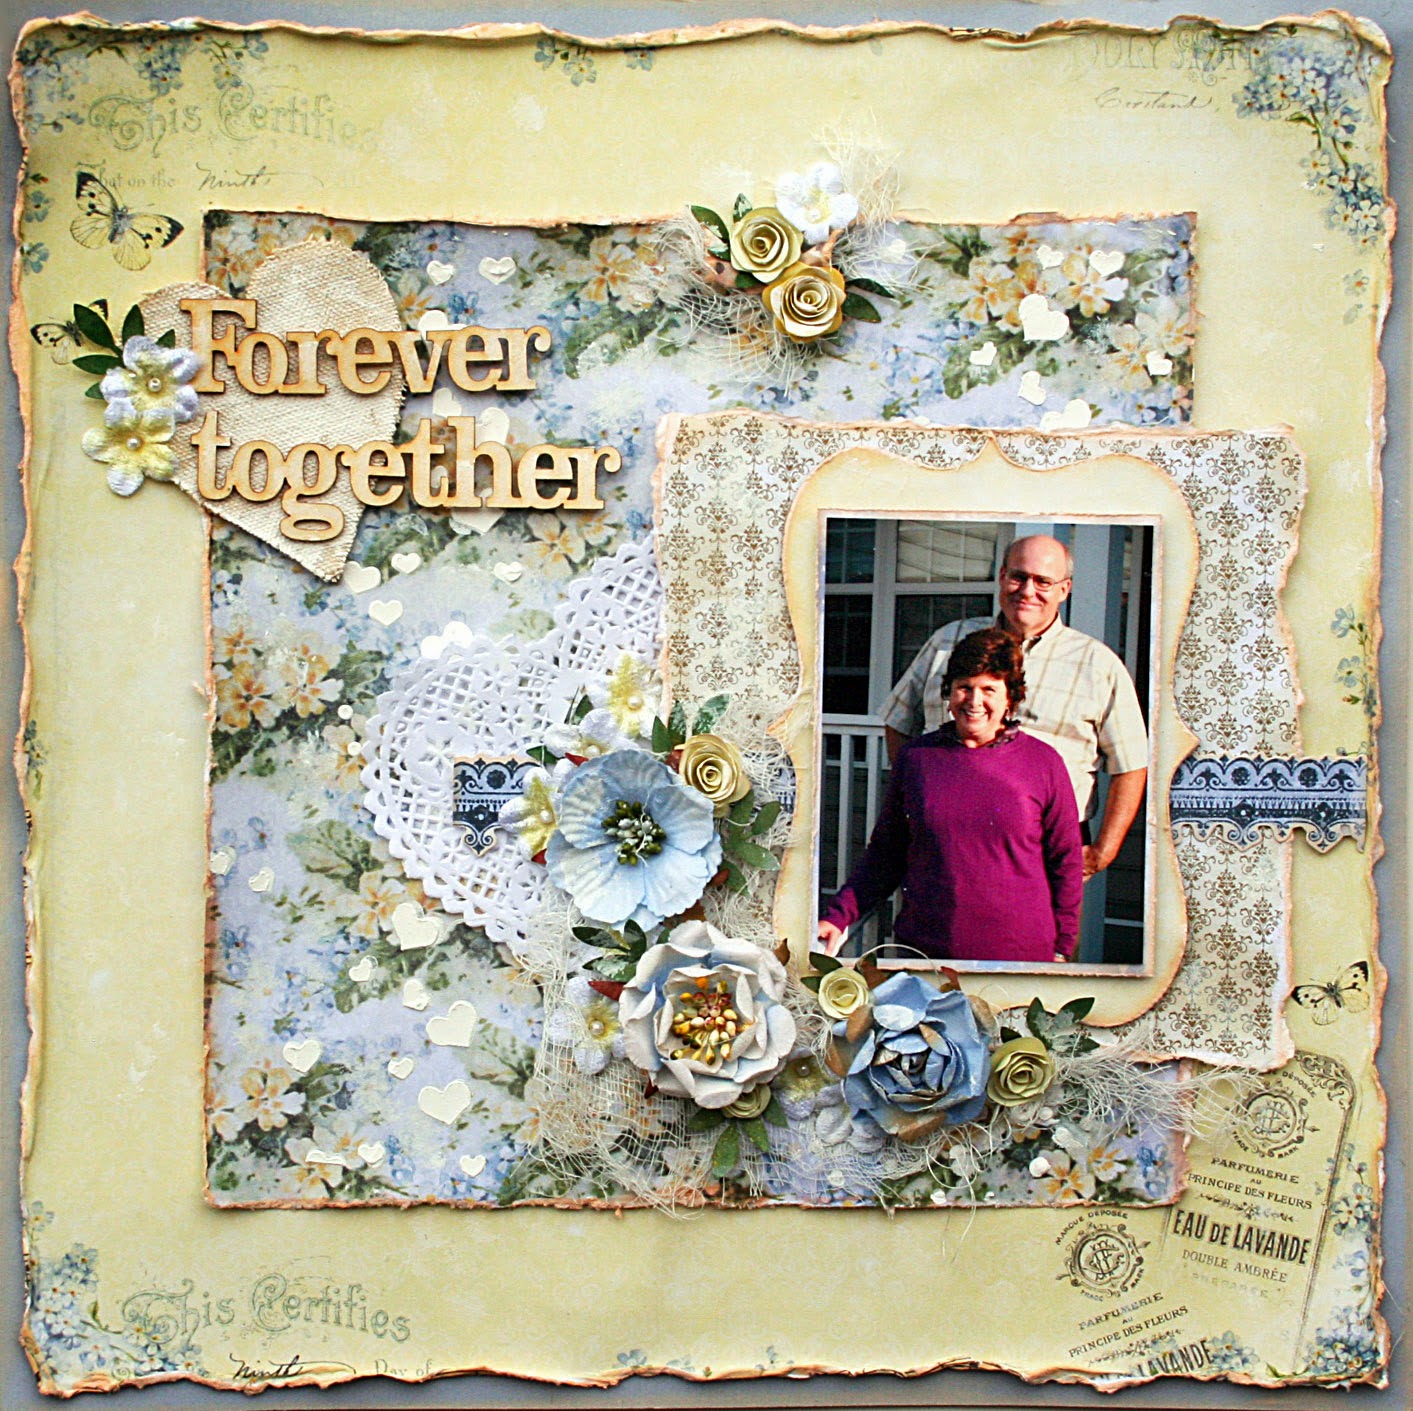
For these first two LOs I've used Inkido Beautiful Memories and Magnolia  papers from the kit along with stickers from the Kaisercraft Key to my Heart collection.  There's a Heidi Swapp confetti mask in the kit that I just loved and used on both of these layous to mask the tiny hearts.

I especially love the Prima Cling Stamps Faux Stitch included in one of the addons.  I am not a fan of my sewing machine and I just loved stamping on my stitiching around the edge!


Supplies - all from the KOM and addons unless otherwise noted:

Patterned paper: Inkido Beautiful Memories collection blue - Sage Memories, green - Green Blossom, fussy cut behind photo Crafty Secrets Love Mail, 6" square - Magnolia Smoething Old; Kaisercraft Key to My Heart sticker sheet - Heart border
Chipboard: Leaky Shed Studio cupids with heart (from my stash)
Embossing powder: Stampendous Shabby Pink embossing enamel  (from my stash)
Flowers: Petaloo Flora Doodles Forget Me Nots White, Prima Lyric Vine 564513, Kaisercraft paper blooms dusty pink
Ink: Prima Rosebud (from my stash)
Mist: Shimmerz Bed of Roses, Crushed Coral  (from my stash, included in previous kit)
Masks:  Heidi Swapp Confetti
 Masking paste:  13 Arts Ayeeda gesso (from January KOM)
Other: Prima Cling Stamps faux stitch 570514; FUL lace


Supplies - all from the KOM and addons unless otherwise noted:
Cardstock:      Paper Studio blue (from my stash)
 Patterned paper:  Inkido Beautiful Memories collection:  yellow - Yellow Music, blue - Blue Flowers; small print sq - Magnolia Something Old, Something New 6 x 6 Shoe Ornament, Kaisercraft Key to my Heart Collection Sticker sheet.
Chipboard:  13 Arts Chipboard Timeless collection words
Flowers:   Petaloo Ruffled Roses Slate Blue, Petaloo Flora Doodles Forget Me Nots White,
Masks:  Heidi Swapp Confetti
 Masking paste:  13 Arts Ayeeda gesso    (from my stash-January KOM)
 Other:  FUL canvas heart
 Unknown:  cheesecloth (from my stash), rolled roses, heart doily,

From the Small Art, Big Passion add on kit, I made this card and tag.  I added the Leaky Shed Oval frame on the card from my stash and the butterfly is from the Mixed Media Addon.  Its a Flying Unicorn Adornment that I've embossed.


 This sweet oval canvas is included in the Mixed Art Add on.


And finally, the off the page project that is a candy box.  I used Kroma crackle for the surface and the hearts cut out as the base layer is the silver sheet included in the Mixed Passion addon.  I turned it over and used the white back side and dabbed on some Stampendous embossing enamel in shabby white.  The white flower vine is a Manor House vine.


Thanks for stopping by!

LinkWithin

Related Posts Plugin for WordPress, Blogger...