I'm excited to introduce you to one of Fabscrap's newest lines, Love 2 Travel! Check out the entire Love 2 Travel collection, here.
I've used the Paris paper from the collection for my layout featuring a photo of my Dad when he was in Paris just after the end of WW II. It was a bit of a challenge using pink on a guy layout but I am pleased. You know, you just have to get past thinking pink and guys don't go together, LOL!!

I've used a Prima Almanac vine and tucked in some daisies from I Am Roses.

I heat embossed some metal bits with gold embossing powder to tuck into my cluster. I will admit to being somewhat mad about embossing powder.


For This Project You Will Need:
• FabScraps C73
Love 2 Travel 2 sheets of 00 and 1 sheet of 004
• Black
cardstock
• DC73 012
Filmstrip chipboard
• DC73 013
Viewing disk chipboard
• Border
punch
• White
gesso, paint, molding paste, and mask if desired
• Mist and
inks
• Gold
embossing powder
• Stamps
• Embellishments
of your choice, i.e. flowers, vines, leaves, etc.
Instructions:
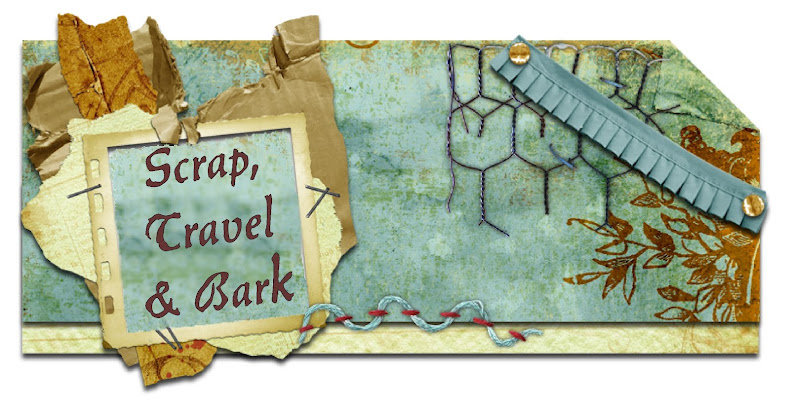
1.
Paint
white gesso over C73 001 allowing some of the color to show through the
gesso. Dry and then tear about an inch
off the left side. Randomly punch the other 3 sides. Ink and distress as desired.
2.
Use a
brick mask or any mask of your choice to mask some bricks here and there. Allow to dry and then mist around the bricks.
3.
Cut a
2" x 12" strip from C73 004
and randomly punch the edge. Ink and
distress as desired.
4.
Adhere
004 to the left side of the black cardstock allowing the edge to show as shown
in the photo. Then adhere 001 to the
black cardstock as shown.
5.
Do some
stamping on the page. Water down some
black paint and then flick dots on your paper with your paint brush.
6.
Cut the
bottom frame off DC73 012 Chipboard Filmstrip so that you have three
frames. Paint with white gesso. After the gesso dries, use a black ink pad to
color the film strip leaving white showing through here and there. Adhere the film strip to the right side of
the page.
7.
Tear a
piece of 001 larger than your photo and glue to a thin piece of cardboard. Tear
strips of 001 and 004 and layer underneath your photo.
8.
Heat
emboss DC73 013 Viewing Disk with gold embossing powder and layer over top the
filmstrip.
9.
Adhere
photo to the torn piece from step 7 and layer partially overtop the viewing
disk and filmstrip.
10.
Add
embellishments of your choice, flowers, leaves, a title, etc.
Thanks so much for stipping by, I really appreciate it!


No comments:
Post a Comment
Thank you for leaving a comment. Your feedback is important to me! I'm always happy to answer questions, just leave them in the comments section and I will respond either here or leave me your email address.