Pages

Thursday, May 21, 2015

Creative Embellishments frames and words

Hello scrappy friends! I'd like to share with you today,  two of my favorite kinds of chipboard, frames and words.  I am just awful at dreaming up titles for my pages so I always turn to my Creative Embellishments chipboard stash and look for an appropriate word title.    They make the title job so much easier!
My other favorite thing is to really place the focus on my photo by using a pretty chipboard frame.  Creative Embellishments has so many pretty frames to chose from, be sure to check them out in the store.
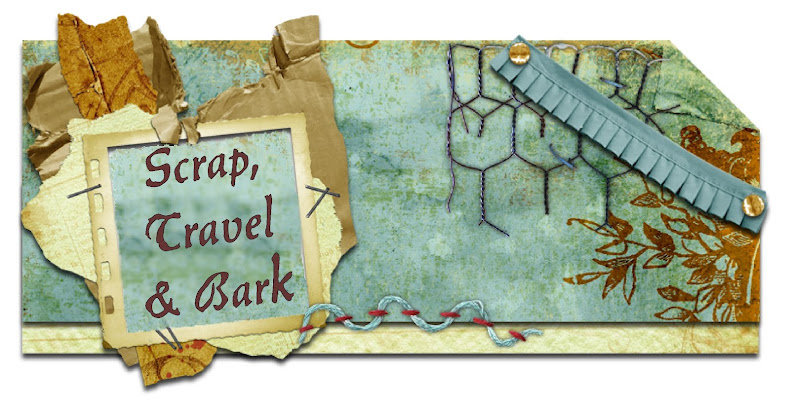
A couple of weeks ago I was scrapping with my bff scrappy gals and was digging through a pile of old old papers and pulled out these old papers that I just loved!  They are probably 5 years old!  I love how they worked with the gold lace and chipboard pieces.  I heat embossed both the frame and the word with Stampendous Aged Gold embossing enamel.
IOD Lovely May 21

Lovely close1

Lovely close2

Lovely close
I’ve used these Creative Embellishments chipboard pieces on my layout today.  Just click on the words and it will take you to our store.


Before I go, I want to remind you about our monthly challenge.  Each month we have a picture inspiration and all you have to do to be entered to win a  gift certificate to the Creative Embellishments store is create a project inspired by our photo and use at least one piece of our chipboard.   A winner will be randomly selected at the end of the month.  How sweet is that?  I hope you'll join in the fun!

Thanks so much for stopping by my blog today!


Saturday, May 16, 2015

It's All About Steampunk! Swirlydoos Kit Club May Tag Challenge


This was a really fun tag to make! I hope you'll join me for this month's Swirlydoos Savagery Tag challenge. The supplies you will need are as follows:

Prima Julie Nutting tag or a tag cut to 3.5 x 8.5"
Aluminum foil
Embossing folder
Double sided tape
Stamp and Archival ink
Clear gesso
2 colors of mist
Black mist, if you don't have black, you could use a dark brown probably
Stencil and masking paste
Chipboard
Washi tape
Embellishments

Step 1:
Get a piece of aluminum foil large enough so that when it is folder in quarters it is slightly larger than your embossing folder.

Run a couple strips of tape on one side of the foil and then fold in half.


Step 2: 
Run a couple more strips of tape down the foil and then fold in quarters. The tape is to hold the layers of foil together. Once it is embossed it will easily stay together. Place the foil inside an embossing folder and emboss.

This is what the foil looks like after it has been embossed.

Step 3:
Cut a tag 3.5 x 8.5" or use a Prima Julie Nutting tag.  Do some stamping at the top with Archival ink.  Use Archival ink so that when you add mist, the ink doesn't run or smear.  I've used Creative Embellishments Distress Corner stamp.

Step 4:
Adhere the foil to the tag.  I used scor-tape on the back and folded the foil around the tag using the scor-tape to secure it.

Tag with foil secured.

Step 5:
Paint the tag with clear gesso.


Step 6:
Select 2 colors of mist and mist the tag.  Be sure to dry one color before adding the 2nd color.

I used Lindy's Grab a Guy Gold and Tibetan Poppy Teal.

Step 7:
Now add some masking.  I used Crafter's Workshop mini time travel stencil and Art C gold embossing paste.

Step 8:
Now let's prepare our chippy.  I've used Creative Embellishments' Mantle Steampunk Gear Timepiece.  Rub over the chippy with black archival ink.  You don't want to cover the chippy, just inking here and there.


Step 9:
Then mist the chippy, I've use Lindy's Grab a Guy Gold.


Step 10:
Mist the tag with black spray and then blot up the mist leaving black ink in the crevices.   Allow to dry before going to the next step.

Step 11:
I wanted to intensify the gold mist in the center so I misted again but I covered up the parts of the tag that I didn't want misted.  

Step 12:
Add a piece of washi tape at the seam between the foil and tag.

Step 13:
Add ribbon or trim at the top and add the chipboard piece.  Now the tag is ready to embellish.


Step 13:
The back of my tag was a mess with dribbles of mist etc so an easy way to cover that is to use washi tape and trim to fit the tag.

The finished tag after I embellishments.  I used an old Making Memories metal piece for the quote.   It was pewter so I used a gold rubz to change the color. Then I added some metal pieces that I got off eBay.  I really love that winged heart in the center of the chippy!


When I received the Swirlydoos Kit Club May kit, I wanted to make a tag with it just to  show you a different look but using the same techniques.  The only thing I didn't do on this tag was spray with black mist.  As often happens,  I ended up covering a large part of the foil but you can see it a bit near the top and on the side.  I used the pink and antique gold mists from the mediums kit on the foil.


I love the Creative Embellishments mini frames that came in the main kit and I used one to frame the cameo.  I used the same technique as I did above on the Steampunk clock but this time I stamped on a little silver Staz-on ink and then misted with Lindy's Winter Jasmine Gold.  The effect doesn't show up great in this photo but it is a mottled antique look.  I flipped one of the silhouette wood icons over and stained it with dark brown stain.  You can see some of the gold masking behind the silhouette and the foil on the right side.


There at the bottom of the tag you can see where I stamped with archival ink and misted over it with pink mist.

Supplies:
From the Main Kit -
Oh so Lovely Specialty Paper Gloss - This is the frame paper and  I fussy cut the flowers from this sheet.
Creative Embellishments Mini Frames
Prima Wood Icons
Bo Bunny Double Dot Jewels

From the Mediums Kit -
Kaisercraft Mists in antique gold and pink
Prima Elementals Weaving stencil

From the Flowers Kit -
Petaloo Mums & Butterflies pink
Petaloo Calla Lilies & Berries pink

From my stash -
Teal seam binding
Petaloo mini Botanicas teal and pink (from an old kit)
Prima Manhattan Times Square flower (from an old kit)
Coffee Archival ink
Silver Staz-on
Lindy's Winter Jasmine Gold
Prima Finnabair small doily stamps (from an old kit)
Clear gesso
aluminum foil
Art C gold molding paste

I hope you'll join my challenge at the Swirlydoos Kit Club Forums.  You do not have to use Swirlydoos kits to participate in the challenge.  And there will be a randomly awarded RAK of some of my favorite tag making supplies to someone.

Thanks for stopping by!


Tuesday, May 12, 2015

Creative Embellishments chippies and Graphic 45


Hi there friends! I’m feeling very cheerful today and what could be better than some fabulous Creative Embellishment chippies and bright and bold Graphic 45 Bohemian Bazaar papers? I just love this photo of my husband and his cousin, love those smiles!

Underneath the Petaloo flowers I’ve used the two large Creative Embellishment chippies from the Photo/Page Corner Set 5. That is such a great set, it comes with two large and two small pieces. I love how the chippies curl around my photo. I finished both the title and these pieces with Stampendous shabby white embossing enamel. That is my go to finishing product for chipboard. I just love the sparkle from the glitter mixed in the embossing powder and the flecks of gold.


I pulled out the word happy from The Happy Word Set for my title, perfect for the photo don’t you think? I mounted the title on a diecut square so that it would stand out. The title would get lost if put directly on the green and blue patterned paper.

I fussy cut some leaves and flowers from the papers and popped them up with foam dots to add some dimension to my layout. This is a great way to make elements on your layout really stand out.
Supplies-
Creative Embellishments:
Happy from the Happy Word Set
Photo/Page Corner Set

Other supplies:
Bazzill french vanilla
Graphic 45 Bohemian Bazaar collection
Stampendous Shabby White embossing powder
Martha Stewart Laurel Leaf punch around the page
Petaloo Burlap Blossoms Teal
Distress Faded Jeans ink

There are so many fabulous laser cut chipboard and wood pieces, stamps and flair in the Creative Embellishments store, and, new items are always being added. I hope you’ll take a few minutes and check out all the great goodies there.

Remember to enter our monthly challenge, BECAUSE you could win a $50 shopping spree in the store! How awesome is that? Read all about it here,

Thanks for visiting with us today, I hope you’ll come back often!

Hugs! Maggi

Saturday, May 2, 2015

OMG!!!! Look who made the Graphic 45 design team!

My dear scrappy buddy Jen, (jrabs)  took this photo of me at CHA Las Vegas when the Graphic 45 Design Team was but a big dream for me.   Seeing my name on the 2015 design team list was just the oddest but happiest sensation.  I admit, I kept looking at it to make sure my eyes weren't playing tricks on me!  I have a HUGE smile on my face!!


A big congrats to all the members of the team listed below!  I am really looking forward to working with all these madly talented ladies and gents!  Links are to everyone's Rount 2 video, check them out when you have a moment, there's some mad talent going on!

Arlene Cuevas - USA
Belly Lau - China
Brit Sviggum - Norway
Danielle Copley - USA
Donna Espiritu - Saudi Arabia
Ginny Nemchak - USA
Joanne Bain - Australia
Katie Zoey Ho - Singapore
Lori Williams - USA
Maggi Harding - USA - Hey that's me!
Mariusz Gierszewski - Poland
Robin Shakoor - USA
Solange Marques - Brazil
Tanya Dudkina - Russia
Tati Scrap - Spain

Graphic 45 Ambassadors
(This is an invitation-only program for educators. What amazing artists and teachers on this list!)


Thank you Graphic 45 for this opportunity to share my passion with you and all the paper crafters out there, especially those that love Graphic 45 as much as I do!!


Friday, May 1, 2015

Creative Embellishments May challenge

Creative Embellishments has an inspiration photo challenge every month on their blog and a great gift certificate prize for the winner each month!  Woo hoo, how awesome is that?

Here's this month's inspiration photo.  All you have to do to enter the challenge is be inspired by this photo.  Tell us about your inspiration, use at least one Creative Embellishments product, and link to your project on CE's blog.  See the May challenge post for all the particulars of the challenge.


I loved the soft pinks and white laces of this feminine photo so I chose these elements as inspiration for my project.  I've created a Happy Birthday tag using CE's coneflower chipboard and Fabscraps Elegant Chic papers from the March Swirlydoos Kit Club kit.


 The coneflowers were embellished with microbeads, Stampendous aged rose embossing enamel and Ranger Antiquities embossing powder.  I have a Snapguide tutorial showing you my process for coloring the chipboard and making this tag.


The challenge twist this month is to use the crackle effect somewhere on your project.  I chose to use Crackle Accents on the birthday tag.

My tags are usually comprised of multiple layers.  I particularly love to use diecut pieces as you can see on this tag!


To give my tag dimension and depth, I use both cardboard and foam tape to pop up my layers.


You could win a gift certificate to the Creative Embellishments store so be sure to enter the challenge!

Thanks for stopping by, hope to see your entry linked up on the CreativeEmbellishments blog!


LinkWithin

Related Posts Plugin for WordPress, Blogger...