Pages

Wednesday, November 30, 2016

A Graphic 45 Christmas Card and Tutorial


"Tis the season to be jolly, fa-la-la-la-la, la-la-la-la!"  Christmas really isn't very far off, are you ready?  Do you have all you cards made and ready to go?   Haaaa!  Nope not me, I send my cards out on December 24th, and that's if I'm lucky.

We can always hope that we'll 
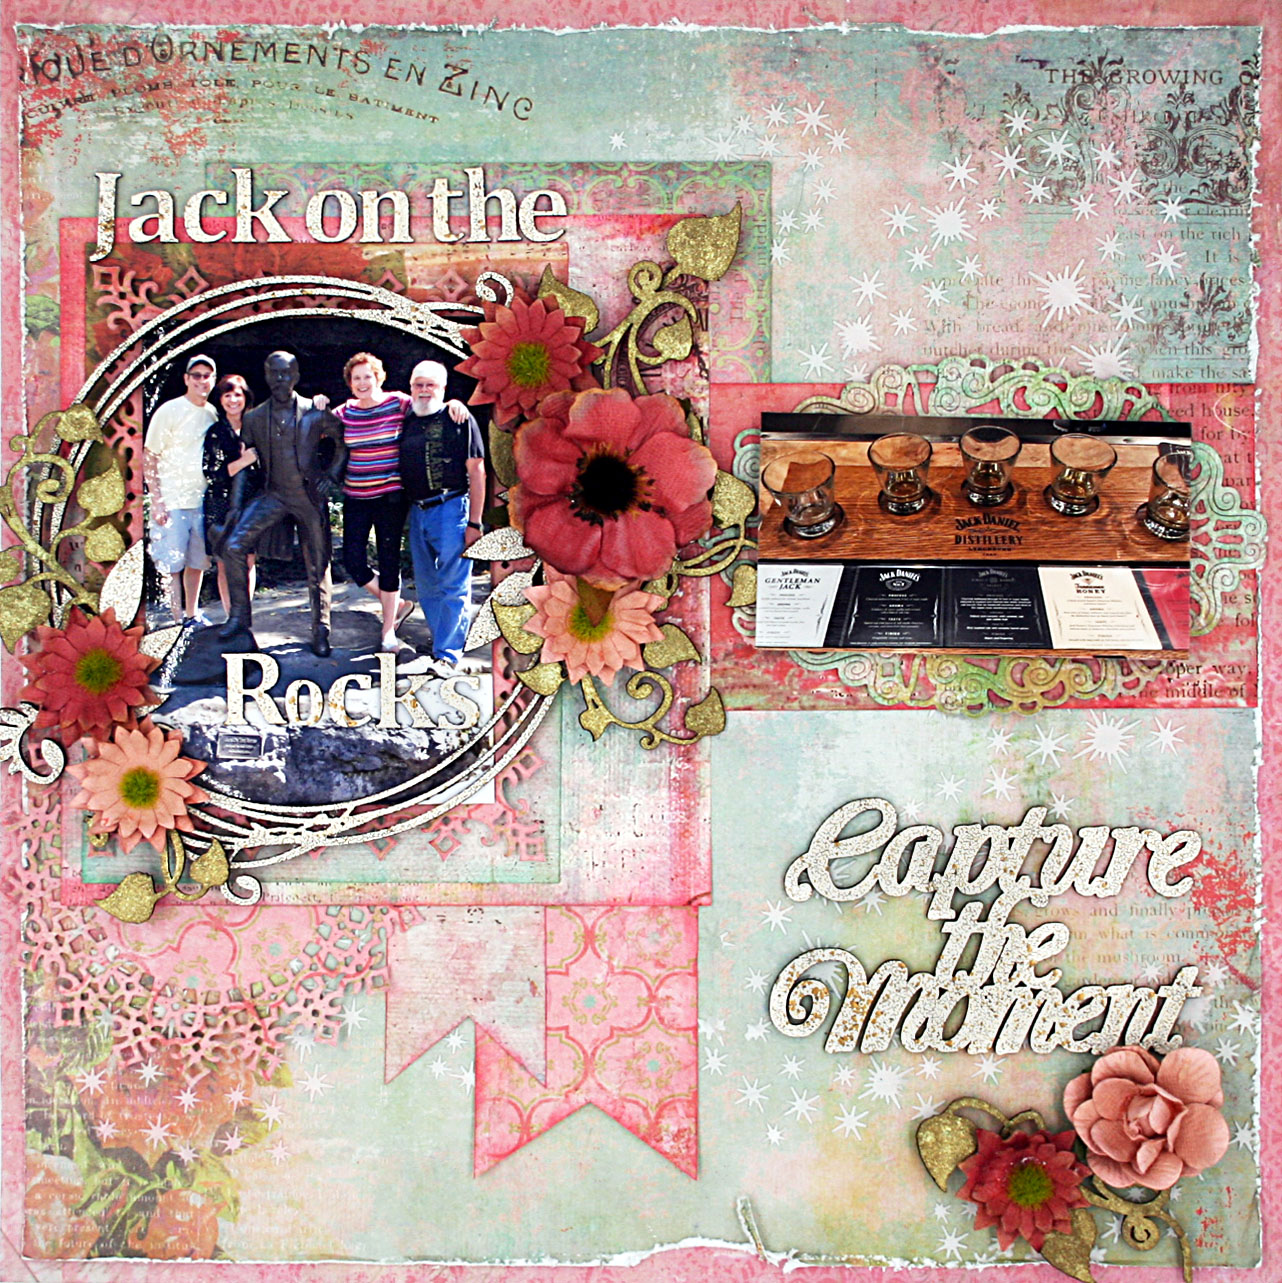
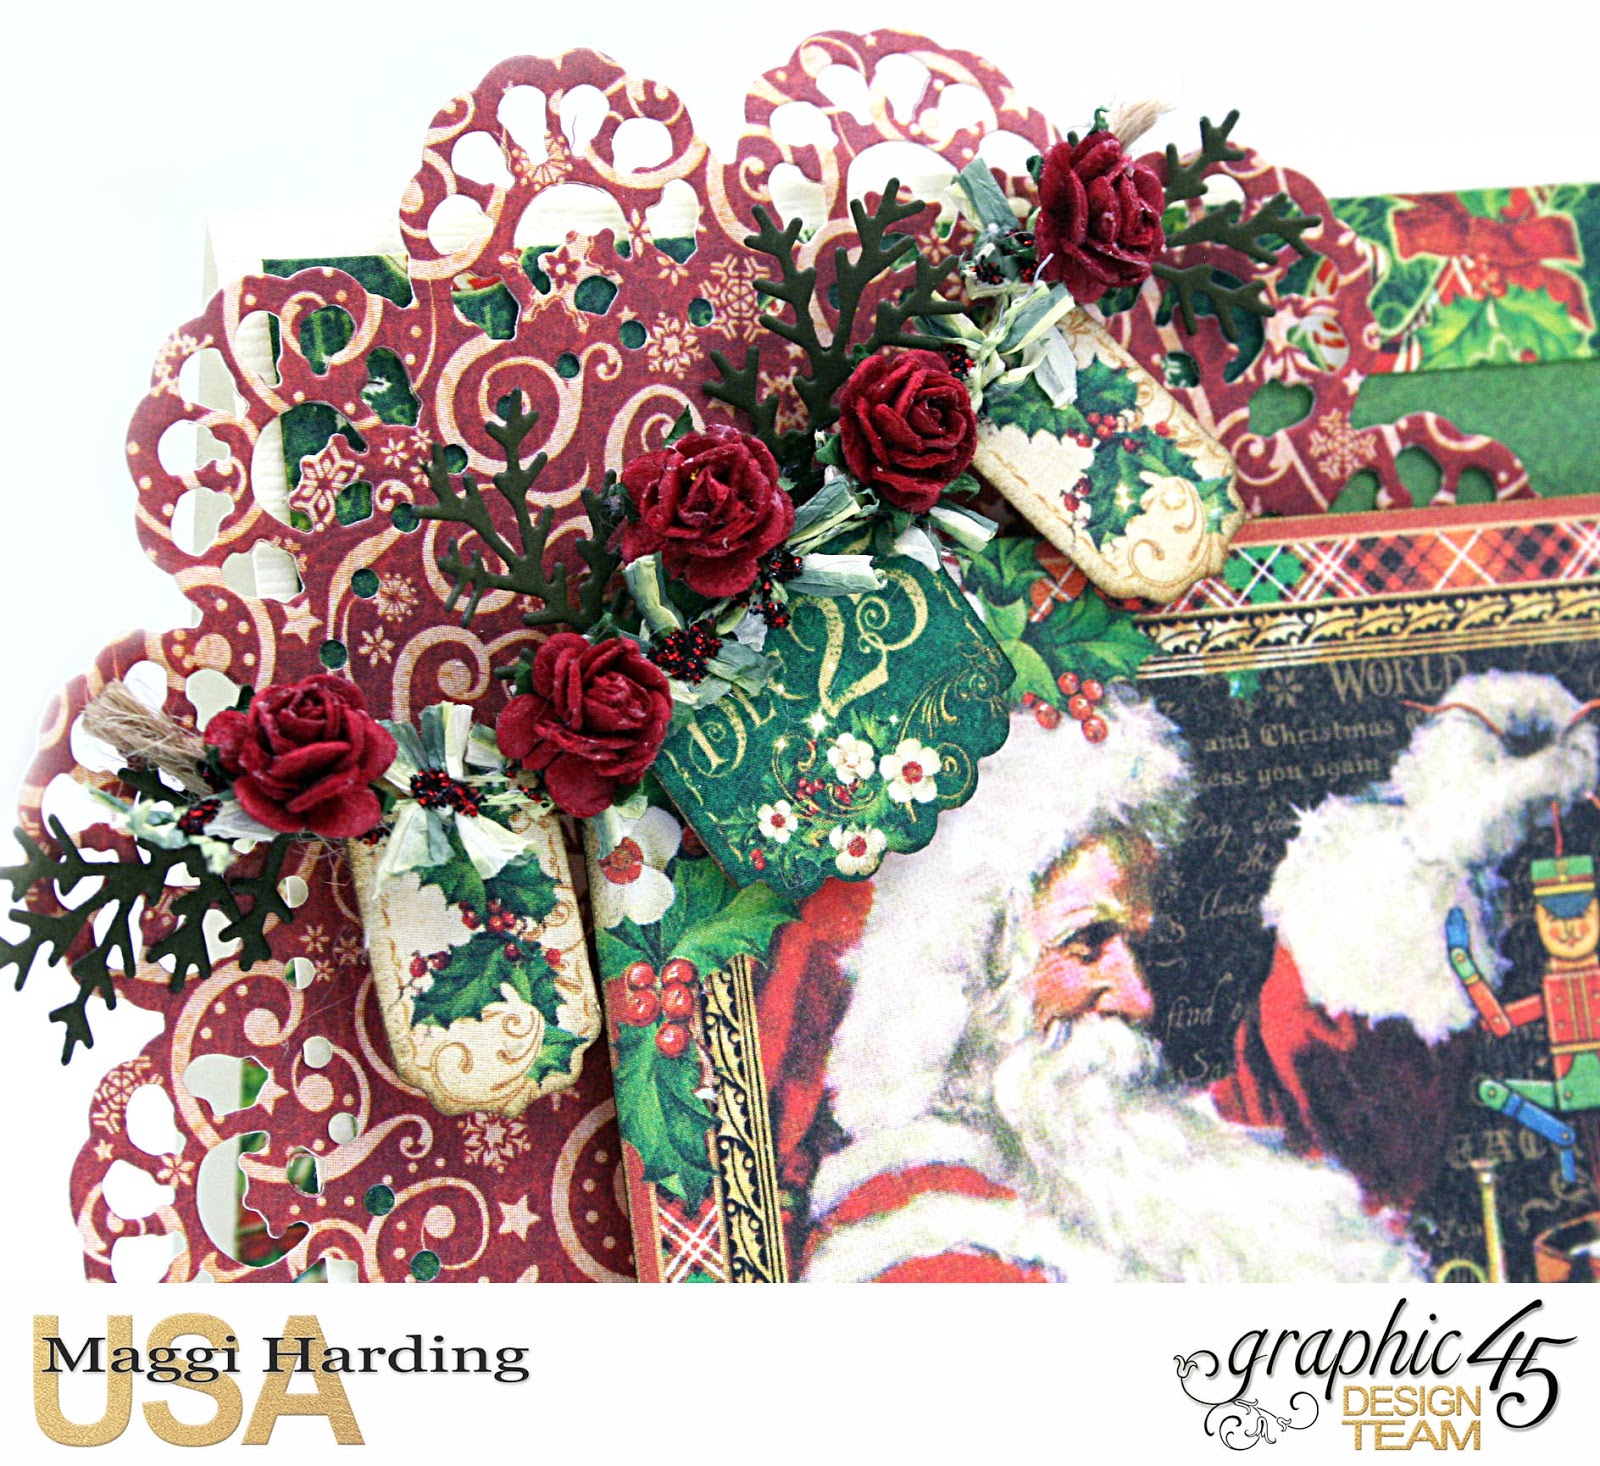
get better, right?  So today I have a pretty card for you made from this year's Christmas collection, St. Nicholas and I have a Snapguide tutorial to make this card.  I used bits and pieces from the St Nicholas collection but you can easily substitute for any items that you don't have.

Tips:
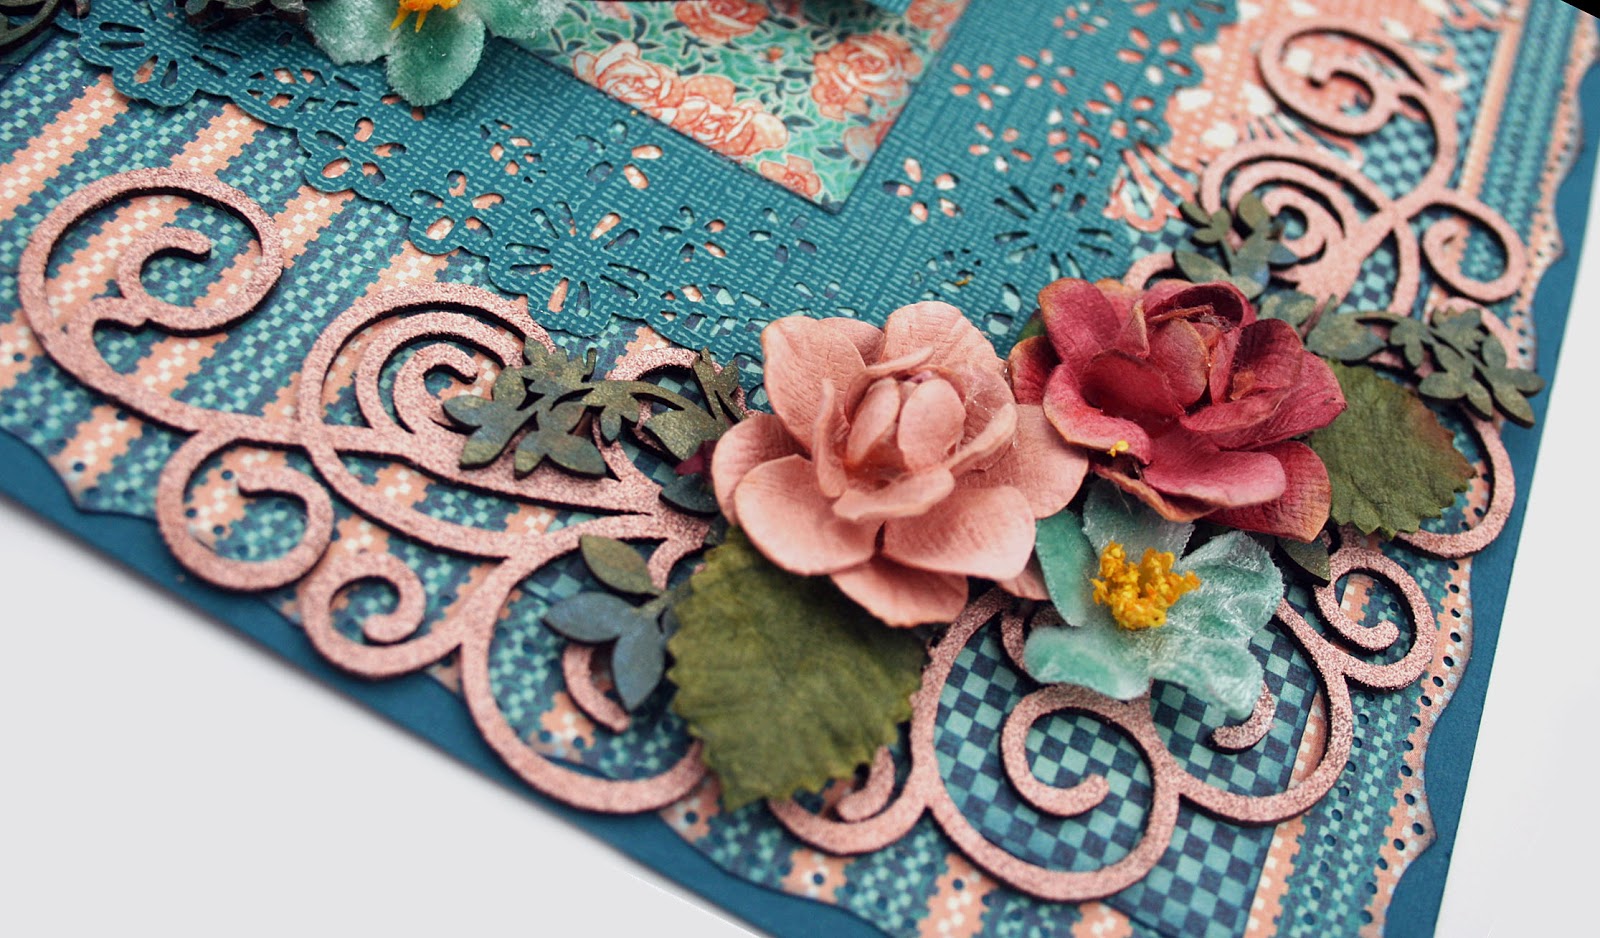
One thing I really love are the ephemera cards that come with each collection.   They are the perfect centerpiece for card and tag making.

Use foam tape to pop up different layers and elements on your cards, it adds dimension and interest.  Even better, use cardboard in place of foam tape, that will save you some money.  

Take a look at my Snapguide tutorial to replicate this card:


Layers...I love layers and flowers!

I added a banner to the right side  of the card and extended it beyond the card so that I'd have lots of room for my floral cluster and ribbons.  This is one of those cards that is really bulky so it'll be hand delivered.  The Petaloo pine pick and anemones look so pretty with the St Nicholas collection, well, I had to put them on this card!

I love pretty little banners decorated with tiny flowers!


I used a simple treatment on the inside with an ephemera card where I can write a personal message.

Graphic 45 Supplies:
Graphic 45 St Nicholas Collection 12 x 12:
Bells and Bows 4501398
Be Jolly! 4501401
North Pole 4501400
Candy Cane Wishes 4501405
Season's Greetings 4501407
Banners 4501414
Patterns and Solids 6 x 6 4501409
Ephemera Cards 4501418

Other Supplies:
French Vanilla Bazzill cardstock
Petaloo Anenome x 6
Petaloo Pine Pick w/Cones & Berries
Petaloo Briar Rose Canvas Holiday Mix
RRR Sheer Iridescent Red Ribbon

Thanks so much for stopping by my blog.  Be sure to visit the Graphic 45 blog every day for more tutorials and lots of inspiration.

Vintage Layout for Creative Embellishments


Today I'm sharing a vintage layout with a photo taken in 1905.  I've used all B sides from Graphic 45's Cafe Parisian collection along with lots of pretty Creative Embellishments chippies and Petaloo blooms.

The photo is of my husband's grandmother so the Ancestry title is certainly appropriate. To color the chipboard, I used Ranger Antiquities California Stucco embossing powder, which is different, in that it leaves a grainy surface rather than shiny.

I used the Circle Vine Frame around the photo, it's definitely a favortie of mine because its just the right size for many of my photos and looks so great layered with flowers.

I used Photo/Page corner set 6 in opposing corners to layer with my flowers.  They are also heat embossed with Ranger Antiquities California Stucco embossing powder.  The lovely flowers are from Petaloo's Darjeeling collection.

Of course you need some leaves along with your flowers so I've used Flourish Set 10.  I used a couple of different colors of Lindy's Starburst Mists to color the chipboard and then I cut the flourish apart and tucked in pieces here and there.

Creative Embellishments Supplies Used:


Other Supplies:
Crepe Suzette 4501431
Parasol Bouquet 4501432
Life is Sweet 4501443
Petits Four 4501430
Ranger Embossing Antiquities California Stucco
Lindy's Starburst Mists 

Thanks for joining me today!  Be sure to stop by the Creative Embellishments store and see what's new.  Nicolle is always adding new designs.  And don't forget our monthly challenge on the blog.  It's always the first post  listed.


Tuesday, November 29, 2016

Layout for Cheery Lynn Designs


Greetings Cheery Lynn fans!  I'm sharing a layout today that I did using Maja Design's Summertime collection.  I am a sucker for anything that resembles red, so this paper screamed at me!

Here's a fun way to use your oval dies in a different way to make a scalloped border.  I used the Royal Scandinavian Oval Doily 2 Piece Die Set  to diecut 2 ovals.  Then I cut them in half and placed them just under the floral border piece making a really pretty decorative border.  You can make a border like this with either circular or oval dies.

My layouts have to have flowers and leaves, lot s of them!  I made large roses using the 3D Rose 1 Die eand then smaller roses with Medium- Rose 7 Piece Die Set.   I always ink the edges of my flowers to give the petals some depth.

I also made some red "black eyed susans" with our  Black Eyed Susan Strip 5 Piece Die Set.  Aren't they pretty, I bet they'd look great on a Christmas project.

One of my favorite leaf dies is Flourish #14 2 Piece Die Set and I've used it here.  I added a little Lindy's Starburst mist just to give the leaves some shimmer and vary the color abit.

I added a popped up layer underneath my photo with a diecut from the  Pierced Stacker 3 - 6 Piece Die Set  and at the top I added a pretty scalloped striped layer cut with A2 Frames Rectangular Scalloped 7 Piece Die Set .

Cheery Lynn Products Used:

That's it for me today.  Be sureto stop by the Cheery Lynn store and take a look at our new shaker card kits and dies.  AND, don't forget to enter our challenge, you could win a $20 gift certificate to the store.

Sunday, November 20, 2016

Let's Make Quick, but Pretty Gift Tags!


If you're like me, you have way more to do this time of year than you have time, but you still want to make your packages special with a handmade tag.  With that in mind, I designed these quick little tags (I made 18 in about an hour) that are pretty but inexpensive and easy to make.  Take a look at my Snapguide tutorial.  


I used Graphic 45's ATC To & From Kraft and Ivory tags.  They come in packages of 10 tags which gives you lots of tags to make!

On these tags, I added a Cheery Lynn holly sprig diecut.  Their dies are great and I was able to cut through two thicknesses of cardstock at the time.


This is the quickest tag of all!  ☺  I simply used a tag cut-apart from Graphic 45's St Nicholas collection, added a tiny to/from tag, a ribbon, flowers and holly.


Lots of examples here, I used Petaloo blooms on all but one.  Hmm, I think I forgot to put a flower on that one.  I am so ALL ABOUT FLOWERS!

Supplies:
Graphic 45 Staples To & From ATC  Tags, ivory and kraft
Graphic 45 St Nicholas collection - any Christmasy papers will work!
Jute twine or string
Petaloo assorted red flowers
5 mm corner rounder
1/2" circle punch


Saturday, November 19, 2016

Shaking it with Cheery Lynn Designs!


Have you seen the fabulous new shaker card kits from Cheery Lynn Designs?  I've used the Champagne Bottle Shaker Card Kit to make this tag.  The kit comes with everything you need to make a shaker:  dies, foam, acetate, and even some cool shakers!  Even better, you can buy the individual pieces seperately.

Here's a closeup of the shaker which I filled with hearts and congrats shakers from Cherry Lynn.  I also added some bling pieces for fun.

When I make tags I like to layer them up and use foam or cardboard to pop them up.  On this tag I used a base paper cut from Prima's Romance Novel on the tag, then from the bottom up, I layered the Priscilla Doily, the middle Horizon Coved Rectangle, and the Mirror Mirror Doily Frame.  I topped that with the champagne bottle shaker and added a pretty bow. Presto!  You've got a fun tag to accompany a wedding gift.  You could put different shakers inside and this would be a great tag for a New Year's Eve bash hostess gift.  The Champagne Bottle Shaker kit comes with champagne bottle and glass shakers.


I appreciate you stopping by today, thanks so much!

Thursday, November 17, 2016

Graphic 45, Petaloo & Xyron Blog Hop


What a treat to blog hop with Petaloo and Xyron!  Graphic 45, Xyron, and Petaloo worked perfectly together to build this great utensil holder.  Be sure to stop by the Graphic 45, Xyron, and Petaloo blogs to see how you can win some great prizes!

Every year I host Christmas at my house, and on Christmas Eve, we do a big buffet of really yummy junk food so I took a 6 pack box and altered it to use for a utensil and napkin holder on my buffet.


 Petaloo shared with us the most gorgeous collection of flowers that are perfect for all your holiday creations.  I used a little bit of everything they sent on my project so you could see how pretty all these blooms are!  You might not think of using a berry pick with Christmas projects, but I think it looks so pretty nestled in there with the poinsettias.  The glittered snowflakes and star picks just add to the overall festive feel of my project.


 I used a Xyron Tape Runner to adhere papers to my box and the Creative Station Lite to adhere the doilies.  The Creative Station Lite applies adhesive to anything up to 5" wide and 1/8" thick.  It works so well with doilies as they have so many intricate cuts that are difficult to glue.  You just run your doily through the machine (no batteries or electricity required)  and the adhesive bonds perfectly to the paper so you can easily adhere it to your project, without any mess, no oozing glue, I love that!  Since it will take materials up to 1/8" thick, I will definitely be using it to attach chipboard pieces.  I've always had a hard time gluing those detail chippies that have lots of tiny little cut outs, the Creative Station will be the perfect tool to add adhesive to these.


 The fussy cut flowers and holly look great when paired with a small Petaloo poinsettia and those awesome star picks.


The idea for this project was born last year when my bff told me how much she liked champagne but since she lives alone, it didn't make much sense for her to buy bottles of champagne since it doesn't keep after opening.  Well, I thought to myself, I will get her some champagne splits, but then I needed a fun way to gift it.  Ah ha I thought, upon spying a 6 pack, yep, that would be really cute filled with champagne splits.

She loved it and now she uses it to hold dog toys for her "grand dog" that occasionally visits.  Honest, that is what she told me!

Many thanks to Petaloo and Xyron for the wonderful products.  I have been using my Creative Lite station constantly for adhering intricate flourishes and details. Of course, Petaloo flowers always complete and make my projects shine.

Graphic 45 Supplies:

Petaloo Supplies:
Petaloo Flowering Berry Pick Black 1170-209

Xyron Supplies:


Be sure to stop by all the blogs to see how to win a prize!


Wednesday, November 16, 2016

Petaloo is blog hopping with Graphic 45 and Xyron

The Petaloo team is blog hoppin' with Graphic 45 this week and we've had the beautiful St Nicholas collection from Graphic 45 and some wonderful sticky products from Xyron to work with!
My sweet poodle Nika needed a Christmas stocking so I made this one for her!  I used Graphic45's new Christmas collection, St Nicholas, to cut out the cuff and toe pieces for the stocking and added a tag from the collection at the heel.  I used a Creative Embellishments paw print mask to stencil on the paw prints.

Xyron sent us some great sticker makers and tape runners to use that are the perfect solution for those tiny parts that you need to adhere.  I fussy cut a tiny holly cluster and a a Santa hat and ran them through the 1 1/2" sticker maker and adhered to my diecut poodle.  Loved it!  I didn't get glue all over everything like I usually do and it stayed stuck.  Now that's the perfect adhesive for me.


I made my cuff by first cutting a piece of St Nicholas plaid for the cuff and toe.  Then I added a Santa tag and banners from the Graphic 45 St Nicholas collection.  The letters actually came from another G45 collection, Raining Cats and Dogs. Petaloo crocheted lace was perfect to accentuate the cuff before adding my floral cluster.  Ohhh I totally love Petaloo's pinecone & berry picks that I tucked under those beautiful burlap poinsettias and briar roses.
That sweet poodle is a Cottage Cutz diecut. I used Ranger Antiquities Weathered White embossing powder to make the curly look on the poodles body. That is a great product when you want a grainy textured look.
I used Crafters Workshop Light & Flufy Modeling Paste to stencil the paw prints, great product and dries quickly!

Petaloo Products Used:
Crochet Trim Red 1482-101

Graphic 45 Products Used:
Raining Cats & Dogs Alpha stickers

Xyron Products Used:

Other Products:

This is it for me today.  Stop by tommorrow and I'll have another Christmas themed treat for you!


Tuesday, November 15, 2016

Layout with Creative Embellishments

Here you have it, posing with Jack Daniels while standing on a rock, so what does that make?  why, Jack on the Rocks of course!

I used one of my favorite frames to accentuate my photo, the Circle Vine Frame which I heat embossed with Stampendous Aged Ivory..  Then I cut Flourish Set 30 up and tucked pieces in amongst all my flowers.  I used Lindy's Mists to color the leaves.  I used the Basic Alphabet set for title words.

For my title I used a word phrase, Capture the Moment, again heat embossed.with aged ivory embossing enamel.  Yes, that is my go to product, I just love that stuff!  On the background I used one of Creative Embellishments stencils, Fairy Dust, along with The Crafter's Workshop Light & Fluffy Modeling Paste.  That is some great stuff, WOW.  It holds its shape nicely so I was able to get nice crisp edges.
I used lots of Petaloo blooms to finish off my layout.  They look so pretty with the Creative Embellishment flourishes tucked underneath.


 Other Products:
Petaloo Darjeeling Anenome x 4 Spice 1490-108
Petaloo Darjeeling Garden Rose x 6 Spice 1491-108
Petaloo Darjeeling Mini x 7 Spice 1494-108
Stampendous Aged Ivory Embossing Enamel
Lindy's Edelweiss Moss Green Starburst Mist
Prima Royal Menagerie Paper Collection


That's it for me today, thanks for stopping by!


LinkWithin

Related Posts Plugin for WordPress, Blogger...