Pages

Saturday, December 30, 2017

Happy New Year with Cheery Lynn Designs

I want to wish you all a very happy, healthy and properous New Year.  I hope 2018 is memorable for you in many good ways!   I'm sad to say that this is my farewell post for Cheery Lynn Designs.  It has been a wonderful 13 months designing for them and I am so appreciative of the opportunity given me.  Thank you so much everyone at Cheery Lynn Designs.  I love their dies, they are so imaginative and fun to work with.  However, it is time to let someone else enjoy the privilege of being on Cheery Lynn's design team.

 Now let's look forward to the New Year celebrations.  To to kick off the holiday, I've turned an ordinary bottle of champagne into  a fun hostess gift by adding this shaker bottle hanger.  I used the New Year 2017 Shaker Die Set to make the shaker.  The die has 2017 as part of it's design so I just simply cut that off and glued the included sentiment, Happy New Years, to the acetate on the front of the shaker.


I used a large cut from the Coved Rectangle Stitch And Cut Tool set and placed behind the bottle hanger, using the bottle hanger as the 2nd layer.  On top of that I used a black starred layer cut with the A2 Frames Rectangular Scalloped set.  Next is the floral design paper cut with the Pierced Stacker 2 set.   All the papers I used are from Graphic 45's Vintage Hollywood collection and the dancing couple is fussy cut from one of the design papers.

The flowers are handmade using a mix of layered cuts from the Judy's Blooms Die,  Sweet Williams Die,  Indie Bouquet , and Floral Bouquet Kit 8 Piece Die Sets.


 To top the hanger and give a real festive look, I added two pretty bows and a floral center.


One thing I really love is a pretty swirly flourish and here I've used Flourish #7 Die.


Wednesday, December 27, 2017

Creative Embellishments Raining Cats & Dogs Mini

Oh yes, I LOVE this adorable mini from Creative Embellishments!!  And if you're a cat person, there's one for you too!

I recorded this video flip though so you could see all the pages and I tell you a bit about how I made the mini.  Please, take a look and while you're there,  I'd love for you to subscribe to my channel.


 There are 3 nicely sized chipboard pages in this mini AND it's quite easy to add some additional pages as I did.

 I added lots of pockets and flip pages to this mini to make it fun!

 It's probably not a secret that Raining Cats & Dogs is my favorite paper collection ever.  When I saw this mini in the CE store, well I knew what I'd be doing!


Creative Embellishments Products Used:


Be sure to stop by the Creative Embellishments store as there's always something fun going on!  Right now there's a 25% off sale going on and that is saving some serious moulah!!  

The New Year is right ahead so let me take this opportunity to wish you a very healthy, happy and prosperous new year!


Thursday, December 21, 2017

A Mini Album and Tutorial for Mini Album Makers Challenge

I am thrilled to be guest designing for the Mini Album Makers Challenge Blog this month! This is a great place to go if you're looking for mini album ideas and tutorials.
Now, I know it's December and  I know many of us are deep into holiday projects, but I thought it would be fun to take a break from that and do something really colorful and fun.  Bright and bold colors are my favorites and so I've chosen Graphic 45's World's Fair collection to make a really fun mini with lots of interactive pages.
In the process video tutorial below, I show you how I made all the pages and share some of tips and tools with you.  If you like my tutorial, please subscribe to my channel and give me a thumbs up, I surely would appreciate that!


Now here's a look at some of the pages inside.
This page features a set of photo mats that are layered over each other and flip up; this is called a waterfall.  These are great fun to build and I used a Spellbinder's Tammy Tutterow  die set to make my waterfall.
I also incorporated a couple of Graphic 45 Policy Envelopes in my mini.  They are great for holding little loose objects that you don't want to lose.  You can use most envelope in your mini, it does not have to be a Policy Envelope.  On the right side there's a tuck spot and a flap that opens up to reveal another photo or journaling spot.

The left page has a flip up that hides a pull out that can hold 5 photos.  The right side is the front of another Policy Envelope.

The right side has a flip up that hides a journaling spot.  It's also a pocket page and you can see the red pull tab peaking out at the top right.

I think this is my favorite set of pages.  The left features a simple pocket, but the right has lots of fun flips.  The below photo shows the page with the first part flipped open.
 After flipping the horizontal layer out, you can flip the floral page up and underneath that is another page that also flips up.  You can better see all the action on this page in the video tutorial.

Supplies:

Graphic 45 Worlds Fair Collection
Cardstock
Light weight chipboard
Zip Dry Glue
1/8" thick foam tape
Scor-Tape assorted widths, 1/8", 1/4", 1/2"
Miscellaneous Petaloo flowers
Cinch machine for binding - Note you could easily punch two or three holes and bind with rings.


Wednesday, December 20, 2017

Merry Christms from Cheery Lynn Designs!


WOW, there are only a few more days left and I still have gifts to wrap, shopping to do and cookies to bake!  But what the heck, I have to take some "me time" out of my schedule to keep my sanity so I put this pretty card together using lots of Cheery Lynn Designs dies and Graphic 45's new Seasons collection.

This is an easel card and they really are simple to make.  Now I got a little fancy with the die cut at the top and that does take a little finagling but if you do just a simple square card it's quite easy.  Here's a link showing you how to make an easel card.  It's not this card, but you can see how the mechanism works.


I used the French Flair Pierce Tool to cut the basic shape of the easel and then a smaller one to fit inside.  Next I layered on the green print Quadrafoil Square Doily 2  cut.  Next is a brown circle cut using the Horizon Circle Boutique Stacker Frames.  Behind the pretty Graphic 45 cut-apart is a white piece cut with the Square Frames 3 Piece Die Set.  It makes such a pretty frame for the cut-apart!


To make the mechanism inside the card that holds up the easel, I popped up a sticker from the Collection and placed that on a small die cut from the Nesting Doll- Oval #2 set and layered that over a decorative paper strip.  I also cut another shape with the French Flair Pierce Tool to place inside the card.
I love how easel cards stand up, they display so prettily!  To finish off my card, I made a poinsettia with the Poinsettia Strip 6 Piece Die Set and added a pretty bow.


Cheery Lynn Dies Used:


I hope your holidays are merry and bright, filled with love of family, friends and good food!  Cheers!

Tuesday, December 19, 2017

A Gift Idea with Eileen Hull's Sewing Box


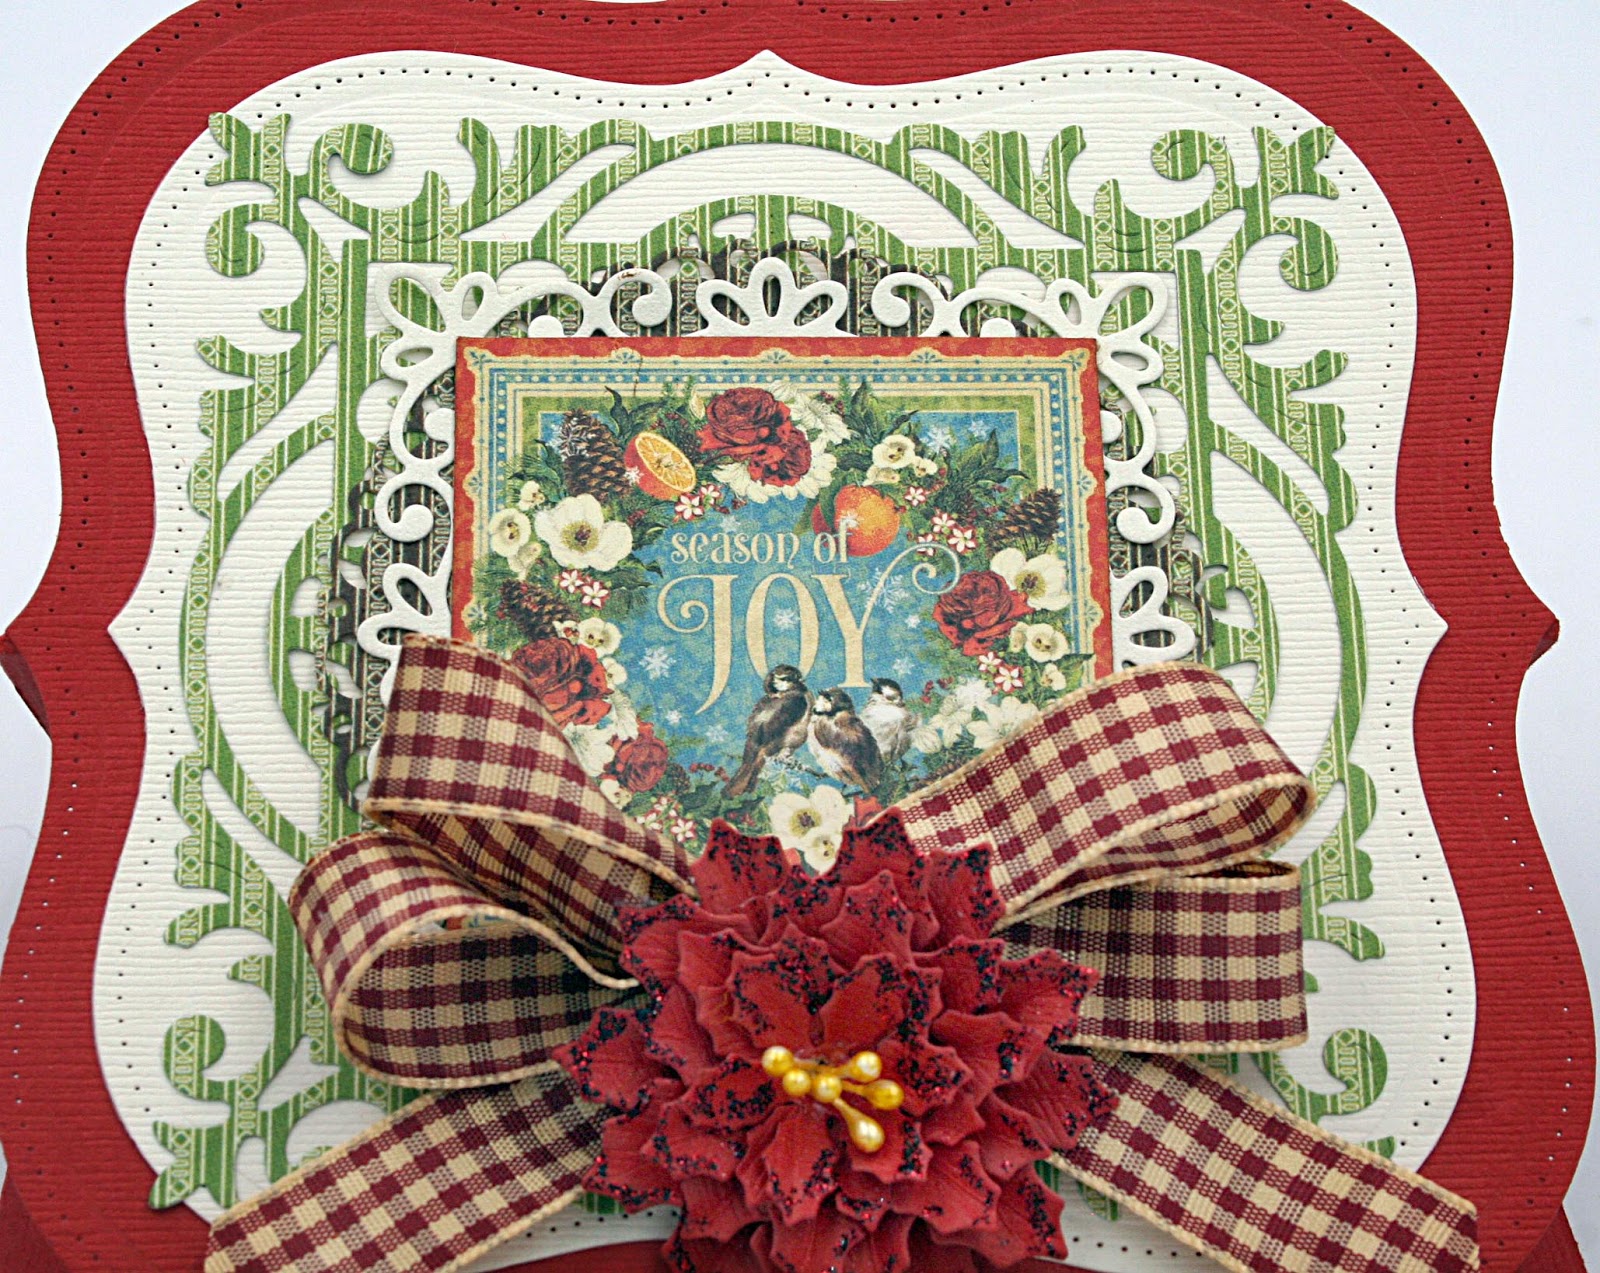
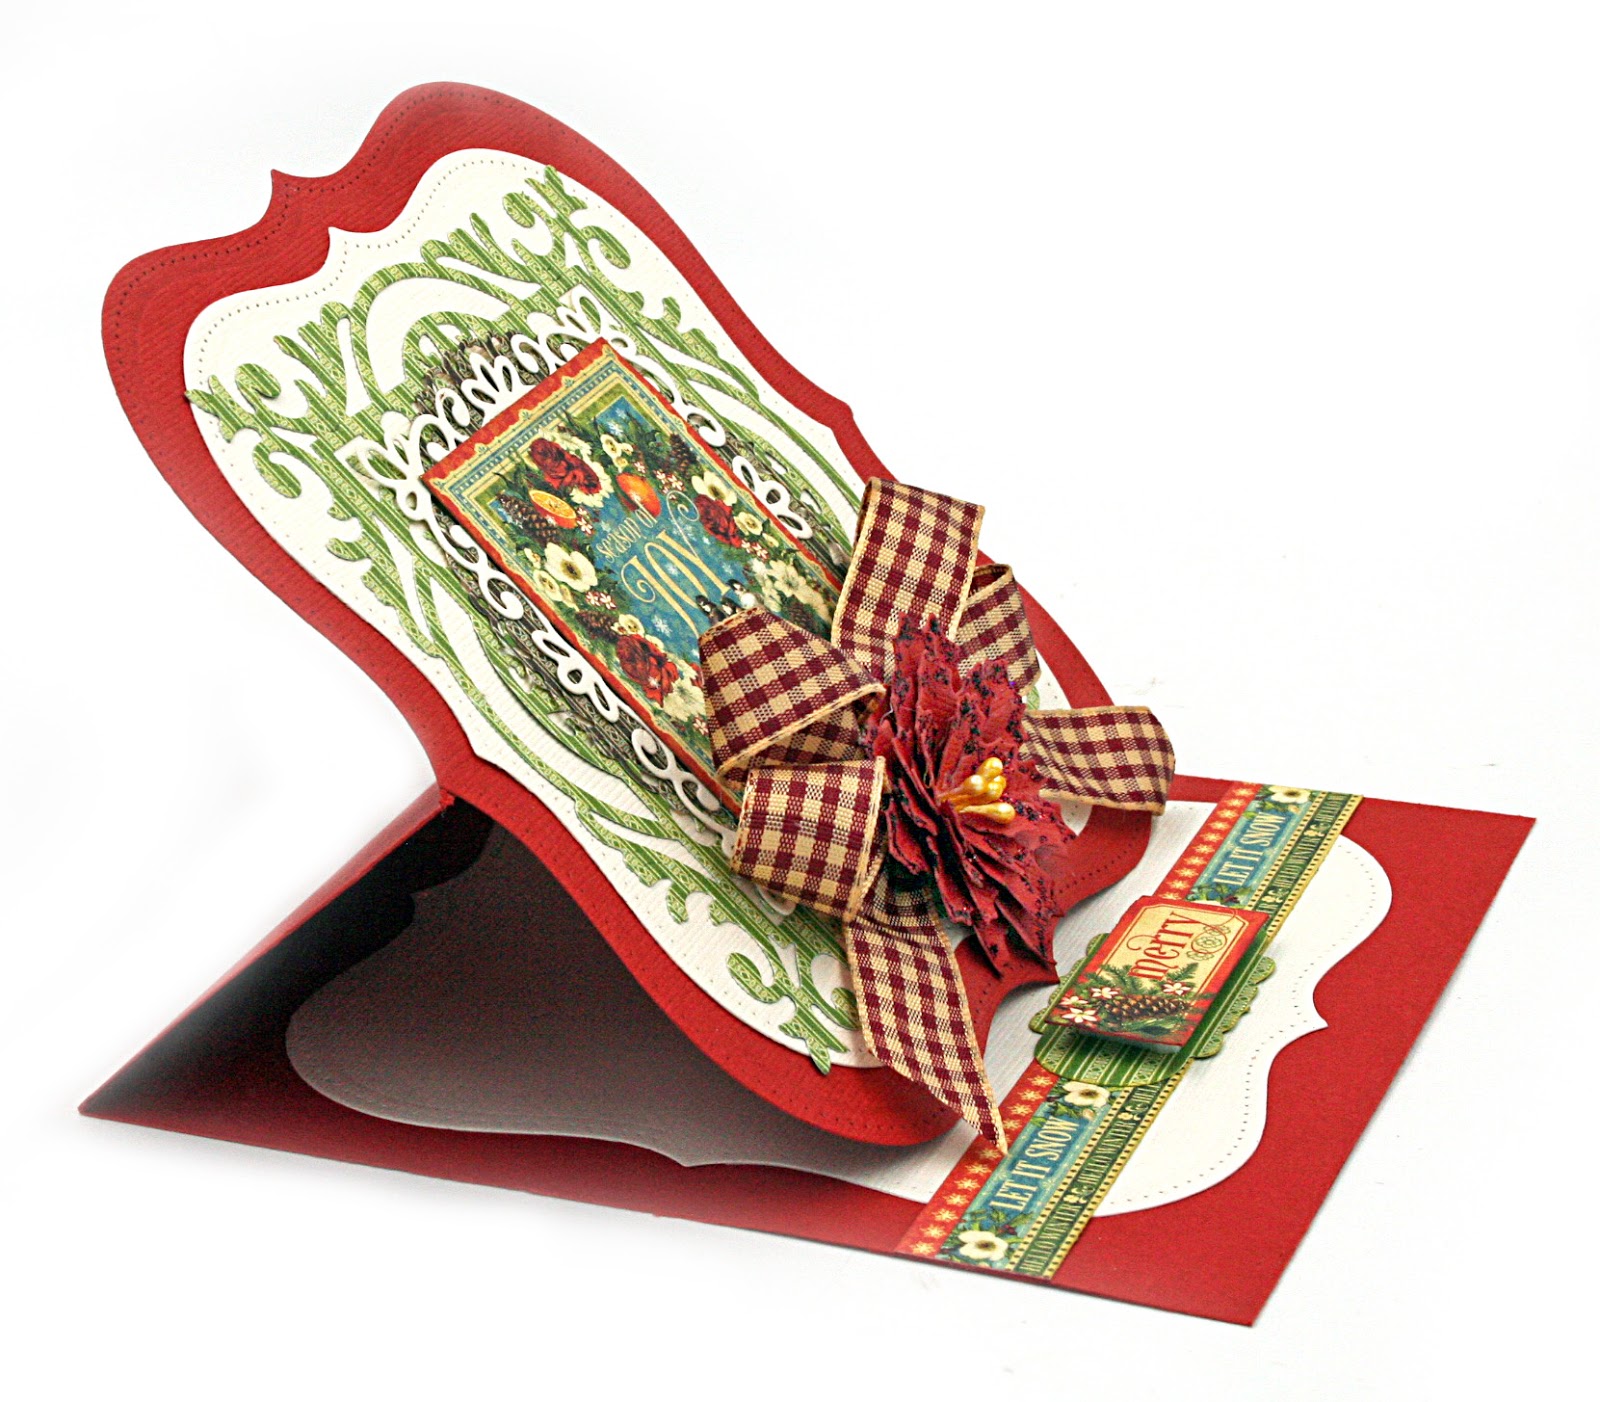
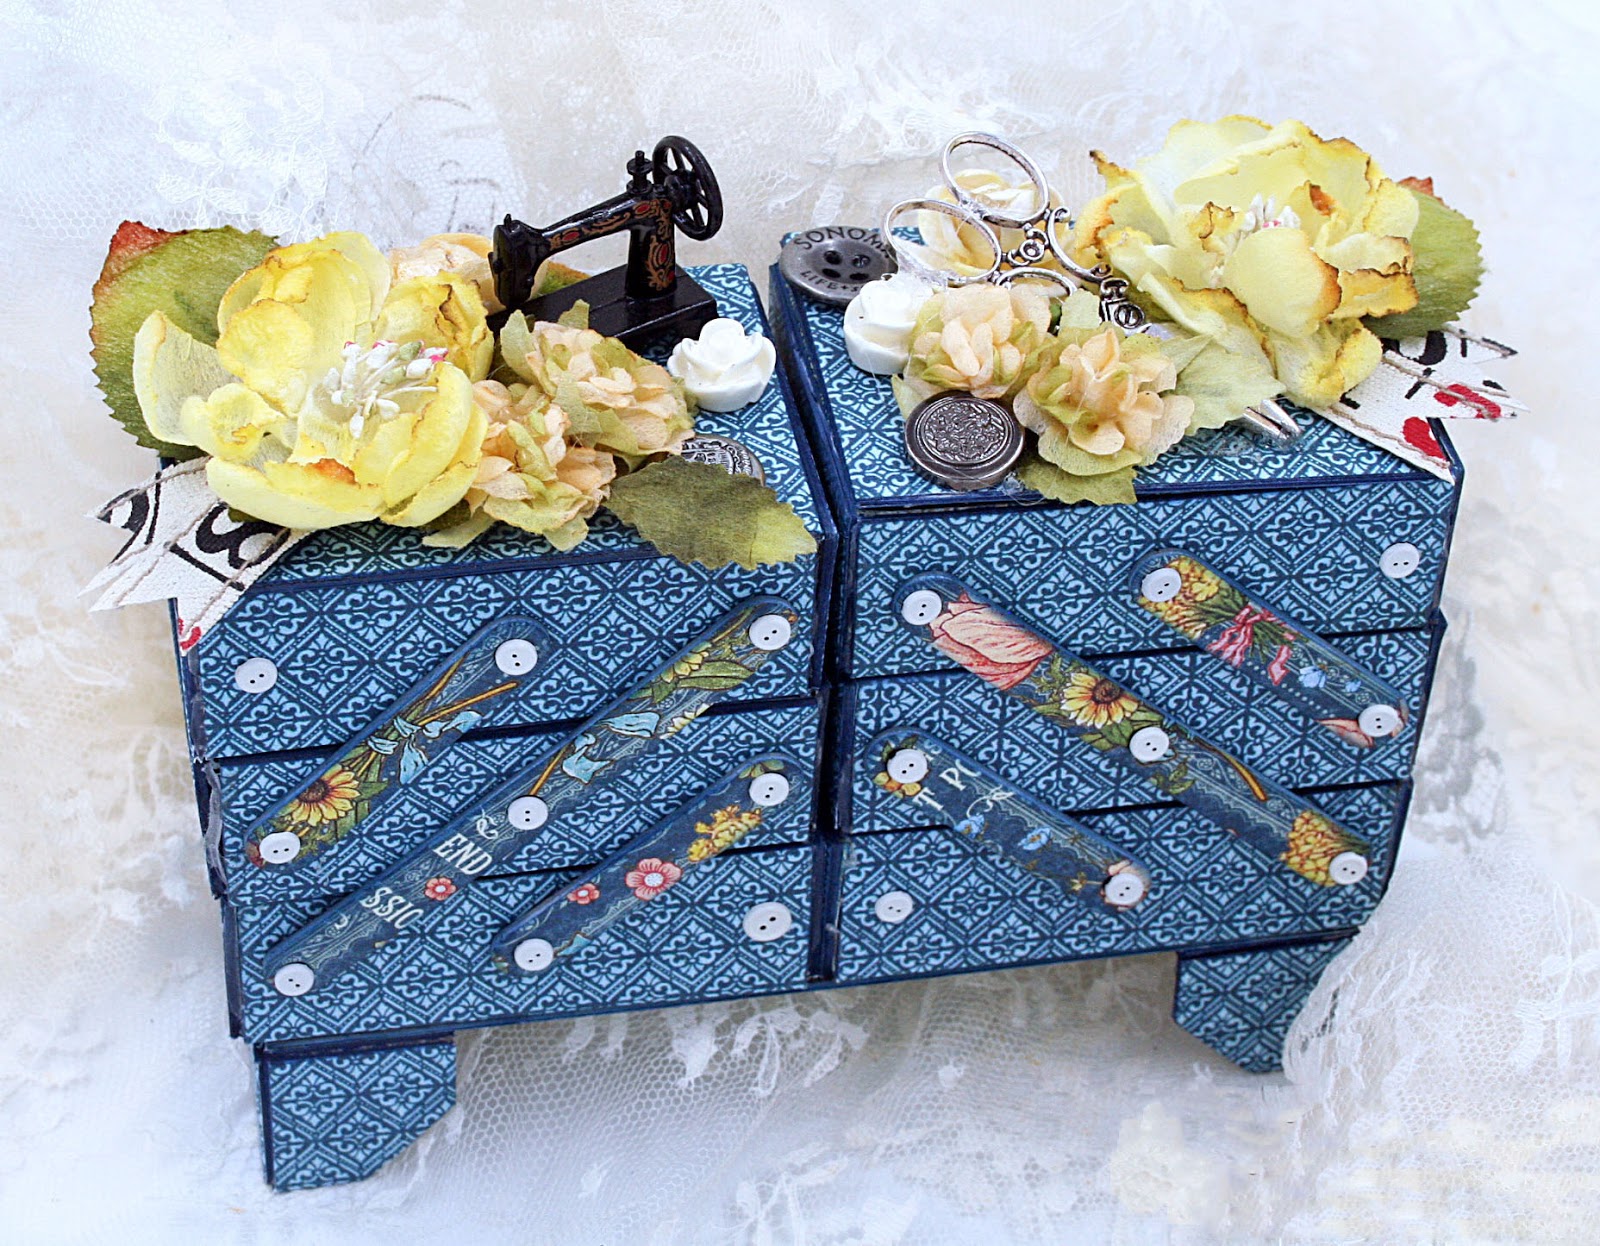
  I used Sizzix's ScoreBoard XL Die - Cantilever Sewing Box by Eileen Hull to make this sweet box. I adore this piece, it's so cute and useful too!  It has 6 little drawers that are perfect for tucking away small pieces of jewelry, sewing notions, any little thing that needs a home.  It's going to be the perfect gift for my Mom as she was an amazing seamstress in her younger years, AND she has this very chest in life size that stands on the floor.  


 It opens up so effortlessly to reveal 6 little drawers that are about 2" x 3".


You can easily make this box, here's what you'll need:

Glue
36 small brads
Ink
Paper - I've used Graphic 45's Penny's Paper Doll Family collection

Tutorial

Step 1: Cut 2 sheets of paper and 2 sheets of mat/chip board to 6" x 12". You will  need several sheets of Sizzix Mat Board or any medium weight chipboard.


Step 2:  Apply adhesive to the mat board being sure to burnish the adhesive down.  Then, adhere the paper right side up to the mat board.  Place the design paper side down over the die and run through your machine. (You will need the Sizzix extended platform for this step.)   Die-cut everything on the die two times.  You should have all the pieces you will need at this point except for 4 drawers and a bottom which we'll cut in step 8.

NOTE:  If you want the inside of your drawers covered in design paper, apply adhesive and paper to both sides of the mat board so that when you die cut the drawers, both sides are already covered.   The outside of the drawer goes face down on your die, i.e. in these photos, you would put the blue side down on the die.


Step 3:  You can use additional sheets of Sizzix mat board or use smaller scraps as I have to cut the remaining drawers.  Use only the drawer section of the die and cut 4 more drawers.


Step 4:  You should have 6 drawers, 2 lids, 2 leg sets, 4 long hinges and 8 short hinges as shown in the photo.


Step 5:  Ink around all the pieces.  I like to use a Faber-Castell Big Brush pen to get in the scored grooves, a Sharpie also works.  DO be careful not to let the pen slip!


Step 6:  After die cutting, I decided to also cover the inside of the boxes.  If your inside is a nice white color you may wish to omit this step or you could paint the inside.  (Note, it is better and much easier, to apply paper to both sides before die cutting!)

To cover the inside with design paper, die-cut 6 drawers using just the drawer part of the die.  I used adhesive sheets to adhere to the inside box.

Adhere the paper to the bottom first and then the sides.

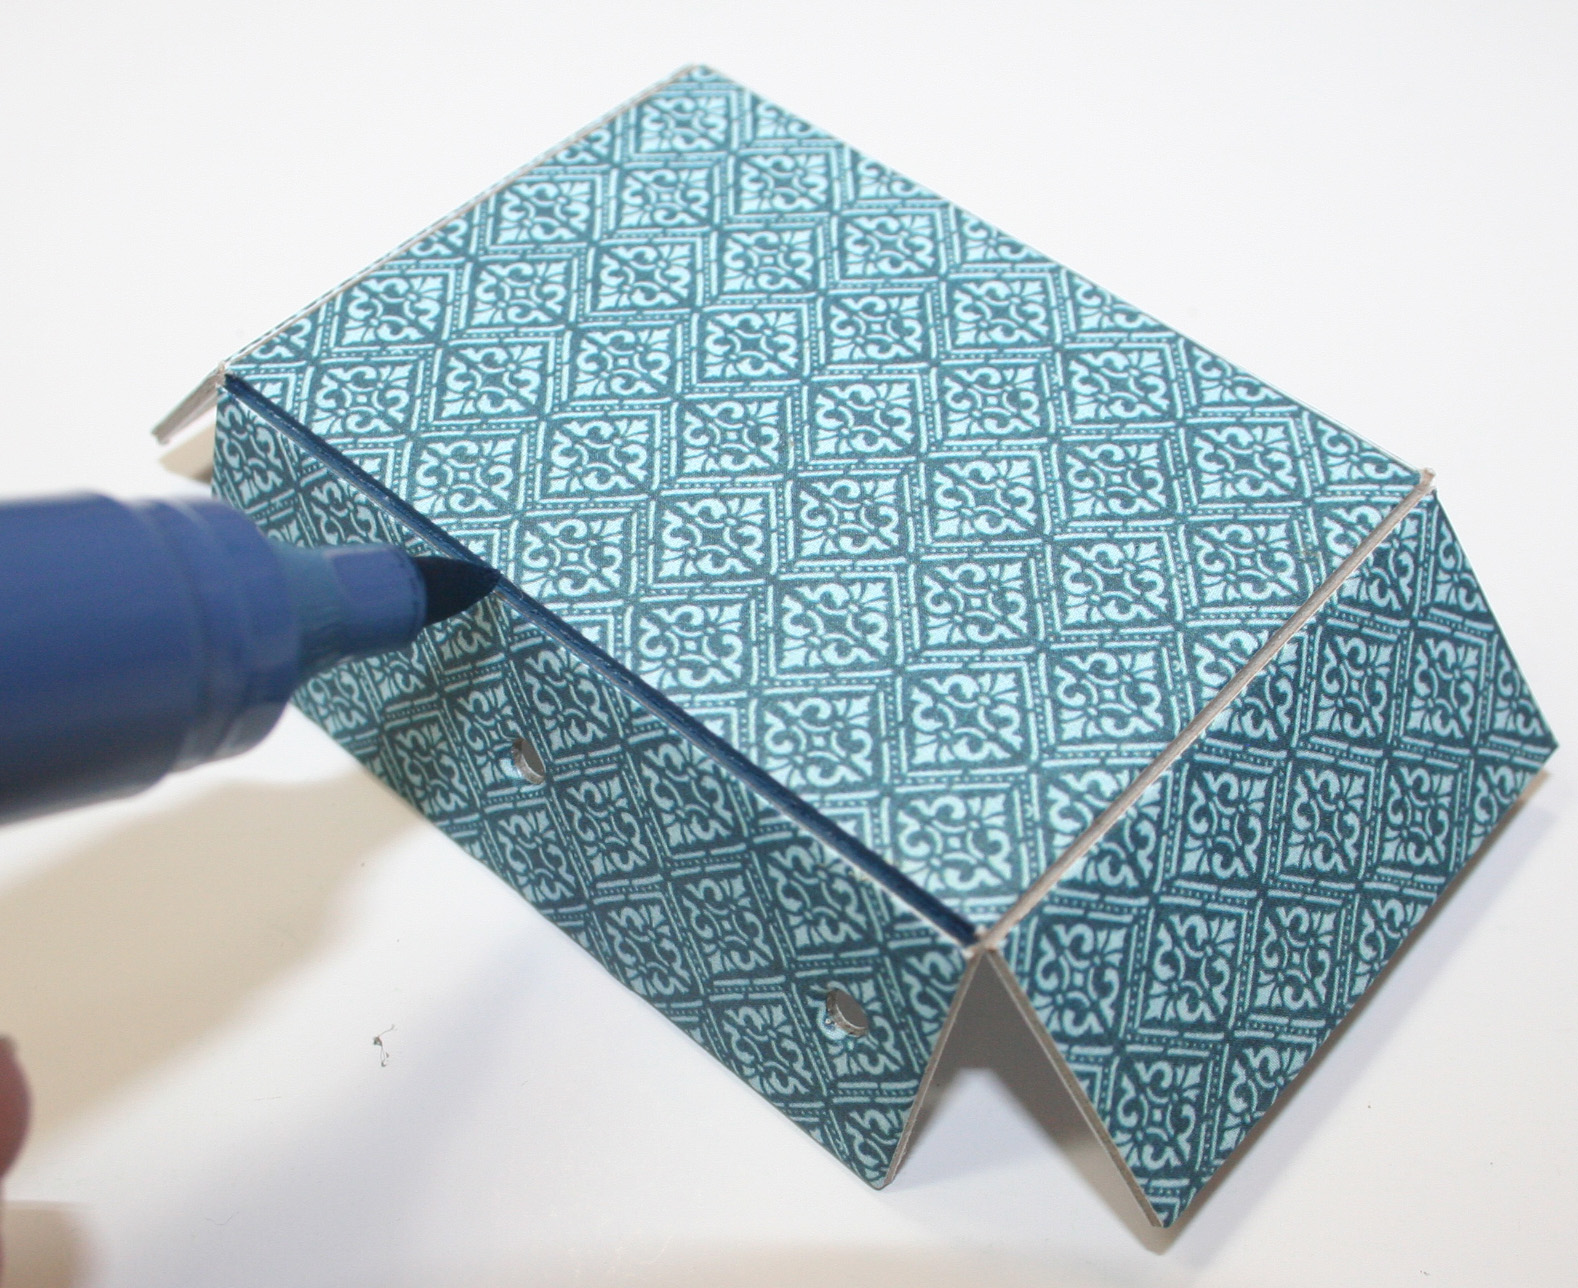
Step 7:  Next, form the boxes by gluing the sides together using a fast drying glue or hot glue.  I found hot glue easier to use but it is a bit messy. You can use a rubber band to hold the sides together until the glue sets up. 

Step 8:  Assemble all 6 drawers.

Step 9:  Cut a piece of chip or mat board and a piece of design paper to 2 1/8" x 6" to use as a base for the drawers.

Step 10:  Adhere the design paper to the chip or mat board.

Step 11:  Apply Scor-tape or other adhesive to the narrow side of a box (side without the holes).  Also apply Scor-tape to the underside of the base in Step 10.


Step 12:  Adhere two of the boxes together as shown below.  Then adhere the two boxes to the base.

Step 13:  Fold the leg assembly on the score lines and ink.  Adhere to the bottom of the base as shown.

Step 14:  Use small brad to attach the 4 long hinges on the outer corners as  shown.  Attach 4 short hinges to the middle as shown.

Step 15:  Stack two boxes on top and attach the hinges as shown.

Step 16:  Stack the remaining two boxes and attach the remaining 4 hinges as shown as well as attaching the other hinges.  Attach a brad through the 4 empty holes on each side.

Step 17:  The two remaining pieces are the lids. (Sorry I forgot to photo this step)  Ink all around and fold on the score line.  Apply Scor-tape to the small tab and insert into the top box so that it forms a cover as shown below.  Then embellish as you desire.


Supplies:


Thanks for joining me for this very long post!  Christmas is coming and it is past time to think about your special handmade gifts.   one off my list.  Oh dear, time is flying by too fast!!!

If you're looking for a fun gift for yourself or a scrappy friend, check out these great eBooks:

Journal Treasury


Wednesday, December 13, 2017

Fairy Dust Mini for Creative Embellishments

Do you believe in fairies?  I do, and I've created a mini album celebrating their existence using lots of Creative Embellishments chipboard pieces, along with Graphic 45's newest collection, Fairy Dust, to bring it to life. It is just the prettiest collection with vivid colors and lots of pretty flowers, and fairies of course!

I've recoreded a video walk through of the mini so that you can see all the details.


Creative Embellishments has some pretty fairy chipboard pieces and I've used one from the Tiny Fairies set on my mini album cover.  They are perfectly sized for little minis like this one. I painted her first with white gesso, then iridescent paint, and finally a nice coat of Stickles on her wings to give her that magical sparkle that fairies have!

Underneath the flowers is a corner piece from the Page Corners  Set 1, that I've heat embossed with Stampendous Shabby Green embossing enamel.


I used a Sizzix Eileen Hull Designs die to create the mini itself.  It's the Passport Journal die and it just makes the cutest little minis at 3.5" x 5". There are lots of pretty pages inside, I'll just share a few with you here.  On this page, I used a Creative Embellishments Fairy Dust stencil to add some "fairy dust" the the page along with another fairy chipboard piece.  I love this one reclining on the stump!


 The Mini Ornate Frames great for using in minis.  Sometimes it's hard to find embellishments small enough to work in little miis.  I heat embossed this one with Stampendous Shabby Green embossing enamel.


 Here's another of the page corners from the Photo or Page Corners Set 1  like the one I used on the cover.  This one is heat embossed with Stampendous Aged Wine embossing enamel.

I threaded some beads and charms onto thin wire and attached to the spine where they could dangle prettily!


Thanks for your visit today!  Be sure to stop by the Creative Embellishments store and see what's new.  Also, don't forget to enter our monthly photo inspiration challenge because you just might win a gift certificate to the CE store.  You can find the details about the challenge on our blog, it's the first post.

Creative Embellishments Products Used:


Other Products:
Stampendous Embossing Enamels
Petaloo Penny Lane Flowers
Miscellaneous beads and charms


LinkWithin

Related Posts Plugin for WordPress, Blogger...